Wednesday, 2 May 2018

TRANSITION UNIT: Location Recce (Vet's practice)

As we all shared the role of producer, I did the location recces for our shoot.

For the shoot we needed:
- a vet's surgery (exterior)
- a waiting room
- a consultation room
- an operating theatre
- Sheila's home

Initially I thought of the events venue we used for our Documentary Unit shoot. This venue has a lot of plain rooms which can be manipulated to look like a waiting room and a consultation room.

I went to the location to check out the space and find out the details of the room and which props / equipment we would have access to in the location.

Room 3 of the venue is a large white room with a TV on the wall, and chairs and tables to use.

This could be used for the waiting room scene, the consultation room scene and the operation theatre scene as the room can be manipulated to look different ways. I checked that we could change the room around and stick up posters with white tack - this was all okay. The venue also had a flip chart to use which the vet could use to draw the outline of the cow, a metal trolley which could be used as a medical trolley for the vet's surgery equipment and a TV screen which could be used for vet's information screen / name announcements.


For our shoot we will move the table out of the centre of the room. We would transform the space underneath the TV monitor to look like a waiting room - this would involve putting a line of chairs along the wall underneath. The corner of the room near the door could be transformed into the consultation room - this would involve sticking up vet's posters, dressing the set with appropriate equipment and having the vet dressed in appropriate uniform.


The surgery room will be the plain white corner of the room - we aim to have quite dim overall lighting but with harsh light on the vet and surgery table to emulate the lighting in an operating theatre (as tested in the test shoot).


Outside the room there is a space for a sign to be put up, this can be used to put up a 'consultation room' sign. This will be for when Sheila and Coco walk into the consultation room to establish the location.


Outside the building there are bins to use for the final scene - one recycling bin and normal bin which works perfectly with the script.

I discussed the details with the venue's staff to ensure the location had all facilities we needed and to get the details of our booking sorted.

The room booking would be £12 an hour - we would probably need the room for 5 / 6 hours so this would end up being quite expensive - however, we would be using the location for multiple scenes which means we would not need to book any other locations so there will not be any additional costs.

I was shown how to adjust the artificial lighting in the room - they can be turned on or off or adjusted using a dimmer switch - the lighting will be best left off so that we can light the location with our own soft box lighting. There is a large window to let in a lot of natural light which will be ideal for the waiting room scene and consultation room scene (these real life locations usually have very soft, natural lighting so we wish to emulate this) - but we will close the blinds for the surgery scene and rely solely on the artificial soft box lighting (as tested on the test shoot) to give a harsh clinical look.

The room is partitioned with a folding wall - this means that if there is another booking in the conjoining room, there could be issues with sound. I checked with the staff as to whether there will be a booking in the room - there is but only a food and drinks area for the booking in the upstairs auditorium which should mean there will be little noise. There is also a cafe outside the room which could also contribute to noise, however, there should be large periods of quiet times which will give us the time we need to shoot the footage.

As Melissa is doing the risk assessments, I shared the photos with her and my rough notes of the risks I noticed in the location. We will discuss the location as a group and if we all agree that it is suitable for our requirements, we will book it.

Rough risk assessment:
- Trip hazards (chairs, tables, cables in the room as well as cables for the camera and lighting equipment). These hazards can be reduced by taping down electrical cables and mapping out camera movements and actors' movements before shooting. There were a couple of slightly raised paving slabs outside which could also be a trip hazard, therefore, before shooting the handheld footage by the bins, I will map out the movements to prevent injuring myself and damaging the equipment.
- There is very little risk of fire, however, the room we will be working in has a fire exit which will need to remain clear from all equipment and furniture.
- When rearranging the furniture in the room, camera and lighting equipment should be moved aside to prevent getting accidentally knocked over and damaged.

Tuesday, 1 May 2018

TRANSITION UNIT: Test Shoot

Today we did a test shoot for our project. The aim of the day was to try out the script in practice to work out what shots will be required for the narrative of the piece.

As writer / director of our group, Alex wrote the script.


As Director of Photography, I then took this script to begin thinking about how to block out shots. I didn't make a shot list or storyboard for the test shoot as the purpose of this test shoot was to try out which shots would be needed, however, I did use my research into documentaries and mockumentaries to inform my decisions about which shots to try out.

The first thing we wanted to try out on the shoot was the camera angles and lighting for the interview segments. This was mainly for my benefit as director of photography as I had the opportunity to play around with the camera and lighting settings to work out which gave the best look. It was also a good opportunity to re-familiarise myself with camera equipment after being producer on the last project.

For the interview segments I used a two camera set up with a Canon 60D and a Canon 700D and two Rode directional microphones - one positioned near the subject and the other attached to the camera. I matched the settings on the cameras; I used f/6.3, ISO1600 and a shutter speed of 1/100 and then white balanced both cameras. I also used two Interfit Softbox lights to light the subject.


One camera was used for a wide shot of the subject whilst the other was used for a close up - using this two camera set up will allow the editor to edit more seamlessly between these clips (rather than having to use the same camera to film the two different angles).


Aidan ran through his lines as Dr. Stewart (however, as we didn't have access to our location for his scenes, we used the location for Sheila's home). Melissa will then piece these together to test how the two cameras can be switched between. Alex then ran through Sheila's lines - footage of Sheila and Coco will then be layered over the top in the edit - testing this part will allow Melissa to test piecing together the interview with the sequences of Shelia and Coco.

Having reviewed these clips, I think I should have used a lower ISO as the quality of the image isn't as sharp as it could be and there is evident noise in the footage. To then compensate for the darkness of the footage I could have used a slower shutter speed and a wider aperture as well as increasing the light coming from the soft box lighting. This is something I have learnt from the test shoot and will carry through to the actual shoot.

The second thing we tested was the sequences of 'Sheila' and Coco playing fetch. This was useful for me to again test the camera settings but this time in an outdoor environment with bright natural light. I kept varying the camera settings used to try and get the optimum image - I have decided that the best route to go is using a medium ISO of 400, an aperture of f/8 then using a slower shutter speed like 1/60 - this will give a bright yet good quality image which can then be manipulated in post production to give the idyllic look required for these shots. The trickiest thing about these shots was keeping the footage in focus whilst a lot of movement was occurring. Following the dog and 'Sheila' playing fetch meant the focus needed to be constantly adjusted to keep a clear and sharp image - the best way to ensure the footage is in focus is to block out the rough movement of the shots beforehand (however, this can be difficult when working with animals). I was also getting used to using a new piece of equipment - a shoulder mount. At first I found this difficult to use as instead of adjusting the focus on the camera, I was using a focus puller as well as trying to keep the camera steady. I did get used to this equipment and feel it will work well for these shots as I was able to achieve some good quality, steady footage which would otherwise have been rough handheld footage. The steadiness of this footage will be effective in portraying the idyllic look required for these shots.


The next thing to test shoot was the blood splatter. In the script, it is described the blood splatters on Dr. Stewart's face - we wanted to test this to see how easy this would be to create. At first, we used a Lucozade bottle to spray fake blood onto Aidan's face. However, this didn't provide an intense enough blood splatter - it was very weak and not very effective on camera. We revised this method and next tested a water gun to squirt the fake blood onto Aidan's face. This was far more effective - we were able to control the aim and amount of blood splattered better and provide a more intense squirt. This will be more effective in representing the blood splatter for the surgery as it more closely resembles blood squirting from an artery. The camera settings I used for this were f/11, ISO400 and a shutter speed of 1/60 - this created a good quality image that I was very happy with. However, this scene will actually be shot inside with more dramatic lighting so the camera settings are likely to change. Although, using these camera settings did help to inform my decision to use similar settings for the shots of 'Sheila' and coco playing fetch outside so testing these settings was still of use to me (but the main purpose of testing this scene was to test the blood splatter).


As we know we want to use dramatic, clinical lighting for the surgery scene, we thought we would test this. To emulate the overhead light on the surgery table, we used a small LED light and turned this up to its highest setting. We then used another small LED light on a lower setting from below to fill in some of the shadows. The camera settings I used for this were ISO800, aperture f/4.0 and a shutter speed of 1/60. This created a very dramatic look which I was extremely happy with - once the set is dressed and Aidan is in costume, this will look very realistic as a vet's operating theatre. Ideally, the look of this footage would have a more clinical feel which would mean a cooler lighting tone - however, we decided this would be done better in post production to prevent lowering the image quality.


Now that we have performed our test shoot, I will make a storyboard and shot list for our shoot - this will help to ensure that we capture all necessary shots for the narrative of our project. Once I have made my storyboard and shot list, I will send this to the director for any additions / amendments to ensure his vision as director is fulfilled. The shot list and storyboard will also be helpful for the editor as they will understand how the footage is intended to look and will inform their decision of how to piece it together.

What I have learnt from the test shoot

- Having not been behind the camera at all for the last project I was a little rusty with the camera settings which meant I made a few avoidable mistakes. I used a too high ISO for the interview footage meaning there was noise in the footage - this will be fixed for the shoot by using a lower ISO and more lighting from the light sources as well as a slower shutter speed and a wider aperture.

- Retaining focus on a moving subject (especially an animal) is difficult but can be worked around by blocking out movement before shooting the footage - this highlights the importance of a shot list.

- I have learnt how to use a new piece of equipment - the shoulder mount. This allowed me to get some steady footage whilst following moving subjects. Without a shoulder mount, this footage would have been very rough as I would have had to shoot this handheld. The smooth, steady shots will add to the idyllic nature of this sequence which highlights how useful this piece of equipment is.

- Communication with other members of the team is important in order to get the best outcome. I communicated with the director to ensure the shots that I was envisioning were in line with what he wanted as director. I also communicated with the editor about the best way to handle the look of some of the footage e.g. with the dramatically lit surgery scene we agreed I would focus on the dramatic lighting and framing of the scene and allow the editor to adjust the colouring in post production to make the image look more clinical.

Friday, 27 April 2018

TRANSITION UNIT: Supervet - Research

The programme is introduced with a long shot of the veterinarian practice. This establishes the location and subject matter of the documentary.


The narration of the documentary then begins. As the narration continues, different clips from the programme are played to tease what is to come in the programme. This is a good way to begin a documentary / mockumentary - however, as we are only producing a 3 - 5 minute clip, we will not do this in order to save time.


These clips are a range of different shot types; varying from wide shots to medium shots to close up shots. However, most of them are filmed in a fly on the wall style. The wide shots  of the waiting room and reception area are all filmed in a fly on the wall style - where the audience is merely observing the action. This helps to immerse the viewer in the programme as they feel they have a good overview of the action unfolding.


As the narration is still ongoing, we see wide and close up shots of the more surgical side of the veterinarian practice. This helps to establish the theme of the documentary as a factual / clinical programme into the vet's practice.


The titles appear over a shot which they relate to - the title states that the programme is a vet's programme whilst the close up shot displays a dog's paws. 


Waiting room scenes are filmed from a high angle in a fly on the wall style. Sometimes a narrator narrates over these images, however, sometimes in cases such as the one below, discussion is heard between the people waiting. This helps to immerse the viewer as they feel they are part of the scene.


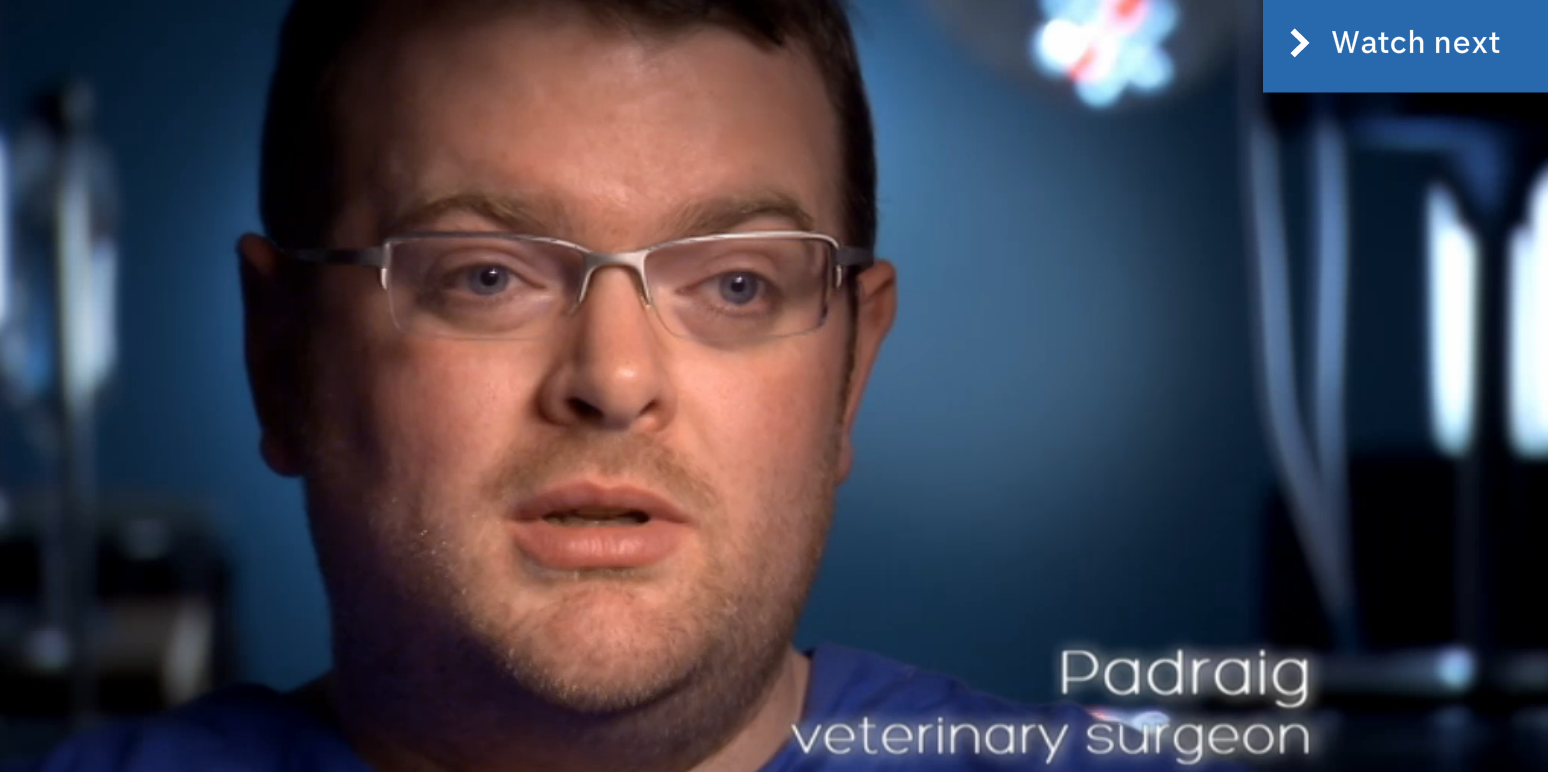
The actuality of the vets, consultation scenes and surgery scenes are interspersed with interviews from the vet staff. These are filmed with medium close up / close up framing with the interviewee framed at one side of the shot (using the rule of thirds). The lighting used for these scenes is artificial which allows for the harsh, clinical look they are aiming for. The interviews are also filmed with a shallow depth of field to make the background blurred, however, it is still clear that the interviewee is in a medical surrounding (as suggested by the glow of medical equipment and the blue hue of the background). I will use a similar technique in our interviews - the background of the interviews will be relevant to the interviewee. 


Fixed cameras are used to capture the pet owners entering the vet practice to capture this scene as actuality rather than having to sequence this scene which would take away from the reality of the shot.


The interviews with the pet owners are warmer in colour, with more natural lighting and set in a more natural environment to set them apart from the medical staff. This helps to give the medical staff some credibility as the clinical nature of their shots establishes this, whilst the pet owners are shown more naturally which allows the audience to relate to them and therefore get more involved with their story / the programme.


When in the consultation room, there are close up shots of the surgical equipment and X-rays to again establish the setting and transition the action back into the vets practice. Shots like these are useful transitions for when you need to jump from one scene to another. I should keep this in mind when filming our project and ensure I get a lot of coverage / close up shots of equipment / props that can be used to transition between locations.


As well as the fly on the wall style, The Supervet includes some low angle shots in situations such as the consultations. This allows the audience to feel closer to the action as these shots are often framed to be medium close ups and therefore the expressions and reactions of the individuals is much more visible to the audience - allowing them to become more involved with the documentary.


What I have learnt:

- As a serious documentary, The Supervet relies heavily on actuality footage as there is not a lot of opportunity to shoot sequences. This actuality is obtained from high angle cameras fixed in the waiting room and consultation room - this gives the documentary a fly on the wall style. I would like to use elements of this within our mockumentary in order to stick with the genre conventions, however, a lot of our comedy is revealed through the characters' faces and therefore a lower angle may work better.

- In some cases lower angles are used - but there is generally a reason for this i.e. for an interview / to show the emotions through the consultations. I will test using lower angles in the test shoot and see if they are appropriate to our subject and style of mockumentary.

- Many close ups are captured of the animals as the animals are at the centre of the programme - I will do similar in our project as our project is also centred around the theme of animals so frequent close ups will help to establish this. During the surgery / consultation scenes, there are many close up shots of the surgical equipment / X-rays. Like the close up shots of the animals, this helps to establish the theme of the documentary.

- The colour treatment is all kept very natural in order to reflect reality. It is slightly cooler in tone to reflect the clinical nature of the location and subject matter. I aim to colour treat our vet mockumentary in a similar style to have the same effect of reflecting the clinical subject matter. The interviews with the pet owners outside of the veterinarian practice are warmer in tone to give a more natural, warm quality - this contrasts with the cool tone within the practice. The interviews with the pet owners are all filmed with a shallow depth of field as the purpose of the interview is solely for the pet owner to give their story / information to the camera and therefore the details of the location are not important for the narrative. I will use a similar technique in our mockumentary - if there is no detail in the location that is important to the narrative, I will use a shallow depth of field to blur the background. If there are details in the location, I will use a deeper depth of field to display these details.

- Interviews should be filmed following the rule of thirds - placing the interviewee in the left or right third and facing them the opposite direction to give them looking room. This is a very simple rule but is important in order to make the interview feel as natural as possible and put the audience at greatest ease.

- The lighting is all kept very natural due to the dependence on actuality - there is not the time to set up lighting equipment as the action may be missed - I will attempt to light our scenes naturally in order to create a sense of 'actuality' and 'reality'.

Thursday, 26 April 2018

TRANSITION UNIT: Come Fly With Me - Research

Before the title sequence, the an establishing shot displays the location of the mockumentary - this is a convention of the documentary genre and therefore this mockumentary emulates this.


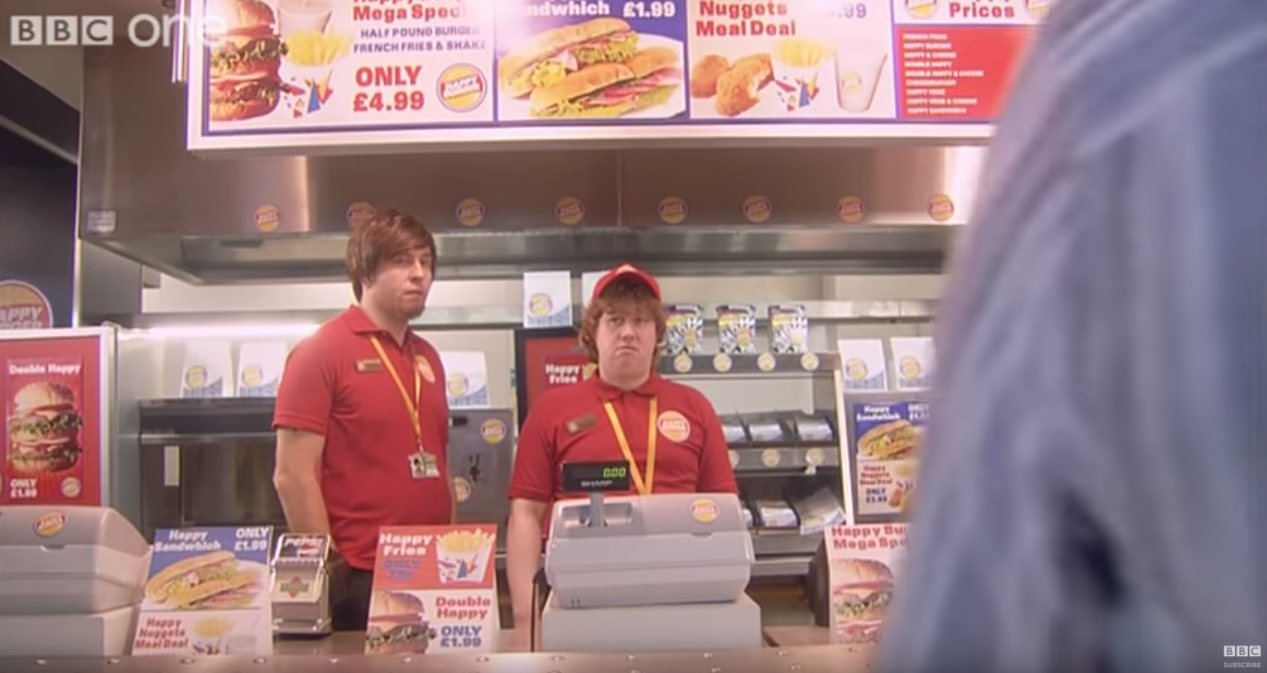
Further establishing shots are used to establish the location and subject matter of life in the airport. Like Cunk on Britain, the introduction uses warm, saturated colours to hint at the comedic nature of the show. This also creates an idyllic atmosphere which adds to the humour when the events that occur within the airport are not idyllic.


As this mockumentary does not aim to be subtle in its mocking of the documentary genre, the titles are exaggerated in terms of the introductions of the characters - the characters all smile into the camera in a very staged fashion. I think this would be good to imitate in our title sequence so that people know from the start that the piece is supposed to be comedic.


The interviews are staged as proper documentary interviews with the subject talking to an 'interviewer' off camera. This is accompanied by an aston introducing the character - as is used in the documentary genre. 


This is then followed by 'actuality' shots of the proceedings in the airport e.g. this interview between Ian Foot and Taaj. This is shot like a conversation would be shot in a drama to allow all the comedy to be observed. The colour treatment of these shots is kept very natural looking to emulate the 'actuality' style as documentaries usually keep a very natural look to show that they are displaying reality.


Like documentaries, Come Fly With Me, features sequences of characters e.g. Tommy walking up to the airport before his interview. This helps to introduce the character before they speak to camera. This is also aided by the narrator who is introducing the character as they are seen on screen. The wide angle of this shot helps to establish Tommy in the airport surroundings as well as introducing him as a character.


Actuality is again imitated when Tommy is shown working in his job. This is also filmed in the drama style, using lower angle shots to highlight the comedy within the scene.


Many of the shots within Come Fly With Me play with focus. This shot uses a pull focus to change focus from the check in staff at the back to the check in staff at the front - this emulates the sequences present in the documentary genre as these also often play with pull focus and bringing different things to attention in the shot.


What I have learnt:

- Not all documentaries / mockumentaries have to be fly-on-the-wall in style. This mockumentary consists mainly of interviews and 'actuality' of the characters. This is shot more in a drama style with lower camera angles such as those used in dramas. This works well for this style of mockumentary as a lot of the humour is in the characters' facial expressions and this would not be seen in the typical higher angle fly on the wall documentary style. This means that there is a lot more freedom in terms of how to film the piece, as I am not limited to just using the high angle fly on the wall documentary style. I will experiment with this in the test shoot as I feel using lower angles would work best in our piece as, like Come Fly With Me, a lot of our comedy comes from our characters' facial expressions.

- The programme uses many conventions of the documentary genre to make the programme appear to be serious and factual, however, the interviews and 'actuality' seen within the programme make it comedic and therefore a mockumentary. In order for our mockumentary to be successful, I should attempt to use the conventions of the documentary genre in terms of the lighting and shot types used and leave the comedy to the characters. 

- The programme uses bright lighting as this emulates the source material 'Airport'. This adds to the comedy of the mockumentary as visually it can be perceived as a serious documentary, it is just the subject and characters which make the programme comedic.

- The colours are all vibrant and saturated - as explored in my colour theory research, vibrant and saturated colours are often used in comedies to evoke happy joyous emotions in the audience.


Wednesday, 25 April 2018

TRANSITION UNIT: Idea Development

Although we pitched to do a mockumentary in the style of the ‘Cunk on..’ series, Alex found this difficult to write without completely copying the style of the source material. The presenter for this series would also have to be very competent at delivering idiotic lines in a dead pan manner –this was very difficult to find as getting these characteristics in our presenter is integral to the success of the piece and no candidates were suitable.

Therefore, we decided to change the idea to follow the more typical documentary style, however, with dialogue and footage which mocks the subject matter. Alex suggested a medical / vet themed mockumentary such as ‘The Supervet’ and ’24 Hours in A&E’. As he is writing and directing the piece, I was happy to change our idea to this. I will now research the style in which these programmes are shot so that I can bring a similar style to our idea. It is important that our piece resembles the typical documentary format (with interviews, GVs, sequences and actuality) to add to the humour when the unexpected events unfold.

We then had a feedback tutorial with Simon where we presented our new idea. He was happy for us to go ahead with this new idea as long as we are able to make it believable.

The locations, props and cast need to be very accurate so that the audience believes the location is a vet’s practice and the main character is believable as a vet. We need to ensure we dress the set appropriately so that the location looks clinical and is believable as a vet’s practice. We also need to buy the appropriate costumes for the cast so that they are believable as either vet staff or pet owners.

It is famously stated that you should never work with children or animals – Simon drew attention to this. As working with animals is integral to our idea, I will look into advice on working with animals.

Next steps following the feedback:
- Research ‘The Supervet’ and ’24 Hours in A&E’ to get an idea of how these programmes are shot – I will look into the colours, lighting and camera angles used.
- As we are sharing the role of producer, I will work with Alex and Melissa to find the locations, cast, props and costume for this project – this all affects the mise en scene of the piece so I need to make sure I am happy that these factors all possess the clinical properties we require for this project.
- Look into advice for working with animals.

Tuesday, 24 April 2018

TRANSITION UNIT: Character Profiles and Cast

As we have no producer in our group, we decided to share this role. Alex took on the job of creating the character profiles (which we then used to find the cast), I looked for locations and performed the location recces and Melissa performed the risk assessments.

Alex described the mockumentary as:

"Vet-man is a short 3-5 minute comedy mockumentary parodying factual entertainment shows such as 'The Supervet' and '24 Hours in A&E'. The film follows Dr. Tim Stewart, a confident yet incompetent vet as he attempts to treat his animal patients with unfortunate consequences."

The cast requirements:

"We are looking for: a male aged between 25 and 40 to play Dr. Stewart, a person of any age and gender to play his receptionist, and a woman aged between 50 and 75 to play a pet owner seeking treatment."

"We are also looking for a female voiceover artist to provide narration for the film."

Through the development of the script, we realised we only needed two cast members - Dr. Stewart and Sheila (the pet owner). The receptionist is no longer required as they are not in this section of the script.

Dr. Tim Stewart

When looking for this character, Alex (as writer/director) said he saw their dialogue being delivered in quite a dead-pan manner to add to the humour of the piece. The vet also needs to have a very sensible look to make it more humorous that, contrary to his sensible and confident appearance, he in actual fact doesn't know what he's doing.

Having worked with Aidan in multiple projects, we saw him as a good candidate for Dr. Tim Stewart. He has the ability to deliver lines in a dead pan manner and we know that he will be reliable for the shoot dates.

In order to make Aidan even more believable as a vet, he will be given smart clothes and glasses for the consultation room scene to establish him a sensible character. Then he will be given scrubs to wear for the operation scene to make him believable as a vet.


Sheila

The requirements for Sheila's character were a less stringent than those for the vet. Sheila just needed to be a 50-75 year old woman who's comfortable working with animals (specifically dogs).

Samantha fits this role perfectly. She is at the younger end of the age bracket but has the look we wanted to go for. She has a kind and caring look to her - this will work great for her interview scene and the idyllic shots of her and Coco in the park.

Samantha will wear ordinary clothes for the different scenes to display her as an ordinary pet owner.


Coco

Coco will be played by Alex's dog Coco. Coco is trained and as Alex's dog should be able to follow orders when given by him. As Alex will be directing the piece, this should work very well and shouldn't pose much trouble.


Monday, 23 April 2018

'AS LIVE' PRODUCTION: Project Evaluation


Pre Production

From the beginning I knew I wanted to do a style show - but the exact subject matter of the show was still undecided. Through research with Melissa and feedback from Helen, we decided on a fashion chat show to show the non-mainstream side of fashion. To inform our idea and come up with a solid structure and ideas for the show's content, I looked through fashion magazines (such as Vogue and Elle magazine), channels on Youtube and existing fashion programmes on TV such as How To Look Good Naked. We ended up pitching a show with a 'Trends of the Week' section, a 'Not on the High Street' section, a 'Very Vintage' section and a 'Digging Through the Wardrobe of...' section. To strengthen the idea, we also thought of components such as the type of presenters, type of set, camera set up and technical elements of the show. All of this together meant that our pitch was strong enough to be commissioned.

Although our pitch contained ideas for the show's content, we wanted to ensure we had the strongest content we could. This meant hosting production meetings and splitting people into groups to research content - this would then be narrowed down to form our final four segments for the show. Hosting production meetings as producer helped to improve my confidence. As producer you need to be assertive and be able to manage the production meetings. In these meetings I gave out my ideas and gave out tasks (such as the research tasks) to the crew and listened to their feedback - I learnt the importance of delegating tasks.

Once all research had been done, I held another production meeting alongside my co producer Melissa to share the finalised content and sections with the different production teams so that they could begin to work on their specific areas of the production whilst we worked on the script. The final segments of the show were to be:
- 'Styles of the Season' which was developed from our 'Trends of the Week' idea but with more structure. Initially we had just pitched for the presenters to talk through the top trends of the week with a VT exploring where these trends could be found for the best price. This developed into 'Styles of the Season' where the presenters discuss 2 trends for each gender before showing a specific trend for each gender on and older and a younger model on the catwalk - followed by a VT where one presenter takes on the challenge of buying the other presenter an outfit.
- 'Fashion Fails' which was a new idea pitched during the research stage of the production meetings. This involved an audience section where contributors share their fashion fails and was accompanied by a VT exploring the topic of receiving the wrong item of clothing online.
- 'Old To New' which was loosely based on our 'Very Vintage' section. Initially we pitched to explore vintage / retro fashion, but it was suggested through the teams' research that we should look more into old fashion trends coming back into fashion. The studio section of this part features a discussion between the presenters about 'dad shoes' - a trend which has come back into fashion - before a VT explore further fashion trends coming back intro style through a fashion shoot format.
- 'DIY' which was developed from our 'Not On The High Street' segment - instead of going to independent stores we interviewed an independent seller who sells goods on Etsy and follow her make a top in the accompanying VT.
- 'Mystery Guest' - this was new segment which was thought of during a meeting with Del. The idea behind this segment was that the show needed to be more entertaining and exciting to match the target channel of E4.

Through the development of the segments it was important as producer to keep in contact with the rest of the production team so that any changes and updates were finalised by myself and Melissa. I learnt that as producer it is important to delegate responsibilities to others whilst ultimately remaining in control to ensure the vision of the programme remains in line with the brand of the programme (a fashion chat show exploring anti-mainstream fashion trends and topics) and remains appropriate for the target channel (E4).

The main job I had as producer during the pre production stage was developing the script. I did the first half of the script whilst Melissa did the second half. The first draft of the script was very rough as  we hadn't yet confirmed our presenters or contributors - once we had confirmed these we developed the script to tailor it towards them and make it more personal and therefore more relatable for the audience. The one thing I struggled with was developing the mission statement for the show - I already knew in my head what the show was about which made it difficult to think what the audience would need to know about the show.

As well as developing the script, I kept in constant communication with the other production teams to approve and finalise their content - e.g. I had to approve the VTs, promo materials, music to be used in the show, the graphics, the set design etc.

As producer I was also involved with the talent on the show - I sat in on the auditions for the presenters and approved the casting decisions for the models and other contributors - this was to ensure they fit the tone of our show. We wanted one of our presenters to be the fashion expert and the other to be a bubbly personality - through a couple of rounds of auditions, we managed to get these characteristics in our presenters.

Production

During the rehearsals and transmission it was my role to ensure they ran smoothly. I had to ensure all crew and talent were on set and ready and that rehearsals ran to time - rehearsals running to time (i.e. beginning and finishing on time) was very important as the transmission had to be exactly 30 minutes long so it was good to practice the show to these exact timings. We had several rehearsals which ran to exactly 30 minutes and the transmission itself ran to 30 minutes - this was due to our organisation as producers and the organisation of the production assistants who were in charge of the running order of the show.

As well as running the rehearsals, I had ensure the talent were kept happy. This meant greeting them at the beginning of the day and ensuring they had everything they needed - then at the end of the day making sure they left happy and on board with the project.

During the transmission of the show I needed to be on hand in the gallery for if any of the segments ran over. During the live show, all of the segments ran roughly to time, however, in the rehearsals the Steals of the Season segment often overran and I would have to make the decision to cut the time from the interview segments instead. To keep the show running on time, I checked the timings with the production assistants every time the show went to VT so that we could work out where to cut timings as soon as we knew there was an issue. This system worked well as this meant myself and Melissa kept on top of the timings so that the show did not over run.

As well as keeping an eye on the timings of the show, I needed to be on hand to the presenters over talk back if they needed any additional information. Myself and Melissa created background information packs on all talent involved in the show so that we knew all the facts about them and could prompt the presenters with information during the catwalk or interview segments if they needed it. We didn't end up needing to use these background information packs during transmission but it was good to be prepared. We also needed to be on hand for if any contributors on the show swore during live transmission - fortunately they didn't but we would have had to get the presenters to issue an apology on air if anyone had swore to avoid legal issues.

Post Production 

The post production element of this project was very limited as the show was edited live by the vision mixer. If an edit was required, as producer I would collaborate with editor to ensure vision has been fulfilled.

To ensure the programme was being put together as intended, I watched the director and vision mixer through rehearsals and fed things back to director if I thought anything needed to be changed. e.g. during a rehearsal of Bonnie's section, we realised a close up of the dress on the mannequin would work well to show the audience the detail of her design - we fed this back to the director and they included the shot in the live transmission. I will approve the final version of the show.

My final job as producer will be to ensure the talent get a copy of the production and thanking them again for their time on the production.

Strengths
- There was good liaison with the different teams to get the outcome we wanted - I provided feedback to the content they produced to ensure everything fitted with the tone of our show.
- The show ran to time and was exactly 30 minutes - this was due to good liaison with production assistants in gallery, during every VT I checked how the timings were with the production assistants to see if any content needed to be extended or cut.
- Visuals aided narrative of production - communication with directors through the rehearsals enabled this to happen. We were able to run through the show multiple times and feedback to the directors if I thought additional shots would aid the production of the show.
- The fashion fails segment went very well despite being the least rehearsed part of the show - as we didn't rehearse with our contributors for this section before hand, the live version was the one chance to get it right and it went very smoothly. In rehearsals when blocking out this section, the camera movements were a bit shaky but this was rectified for the live show.
- The set was more complex and looked more professional than initially pitched - the constant communication with the set design team allowed for them to construct a more complex set which helped to improve the quality of the show and transform it from a student production to a professional production.
- I think the script tuned out very well and helped to set the tone of our show as a friendly, conversational show that provides informative style advice. I learnt that not everything needed to be scripted - script the introduction, factual information, questions / direction for interviews and the round up for the programme. I think the script was strong, especially as I hadn't written a studio script before.

Weaknesses
- In some cases I wasn't assertive enough - I had concerns that our first drag queen would drop out due to school commitments and this is exactly what happened causing the stress of finding a new drag queen in a short amount of time. We did end up with the best drag act for our show but we could have secured them much sooner if we had extended our initial casting search for drag queens.
- The script was developing right up until the week of production which wasn't ideal - although my research showed that this is usual practice in the live TV industry to keep the script topical, it would have been easier for the crew if the script didn't change between each rehearsal. We had set ourselves deadlines for the script, however, we did push these back when we should have been stricter with ourselves.
- The trailer was weak compared to the other components - I should have communicated my concerns with the promo team earlier so that they could resolve the issues in the trailer (such as lack of atmospheric sound and sound effects)

What could I develop?
- In future I need to put my leadership and management skills into practice more and be more assertive. I feel that I lacked confidence in some of my ideas (such as finding a new drag queen) meaning that stressful situations were caused where they could have been avoided.
- In future I need to stick to pre production schedules. I pushed back some script deadlines to allow more time to write the script when I should have stuck more closely to them to allow everyone to become more familiar with the script before the rehearsals and transmission.
- In future I need to ensure my communication extends to all departments. I kept constant communication with the VT teams to ensure these matched the tone of the show but my communication with the promo team could have been better to ensure they implemented the feedback given.

Conclusion

Overall I think the production was a success. Our content developed significantly from our original pitch which worked for the best. Initially when Helen and Del suggested we focus our efforts on researching and developing the content I was hesitant as I thought sticking with our original ideas would allow people to get straight on with their production roles. However, focusing on developing the content before focusing on our individual roles was definitely the best idea as this allowed us to get together some strong content material and still allowed enough time for people to work with this material within their production roles to get the best result. The communication between myself and Melissa and the directors ensured that they directed the show with visuals which matched our content ideas.

I have learnt that being a producer is a bigger role than it first appears - as well as thinking of the idea for the show, you need to stick with it all the way from conception to completion and approve all developments along the way as well as developing the script. Other skills I developed as producer include: good time management and organisation to ensure crew and talent are on set for rehearsal and that rehearsals run to time, creative skills in terms of scripting, good communication skills with talent and crew etc.