The Production Process
I always knew that this project would be a challenge, but I never realised quite how challenging. The pre production and post production aspects of the project didn't daunt me at all, however, the production side of the project (the part that involved directing actors and crew and overlooking the shoot) absolutely terrified me.
The first thing that had to be done was to choose a director, and once that had been done we needed to create a presentation surrounding that director and their key works. Although choosing a director was a little difficult due to the vast number of talented directors, I finally settled on Richard Curtis, the director of one of my favourite holiday films; Love Actually. Once I had chosen my director and film, I got straight into conducting research for the pre production side of my project. One of my key directorial decisions was to focus on colour and using this to reflect on the emotions and feeling conveyed within the narrative. I therefore carried out research into location, costume design, set design and how I could use colours within these areas. I decided to make red a key colour in my work, dressing Juliet in red costumes and having red props within the set design - this helped to reflect Mark's love and affection for Juliet. Throughout my project I carried out much more research in order to gain a clear vision of the visual style of my short film.
Another key aspect of the production process was transcribing my chosen scenes into a screenplay, breaking down and analysing the screenplay in order to understand the feelings and emotions involved within the narrative, creating a new screenplay including any alterations and finally creating a shot list and storyboard based off of the new screenplay. This process allowed me to precisely plan out how I visually wanted to tell the story and where I wanted to position the audience within the scene.
Whilst my research and pre production were still ongoing, we had directing workshops with Steve Finn. The directing workshops one and two helped with my concern over directing crew members and actors. In these workshops we learnt how to block scenes, blocking a scene helps to figure out where the actors will be positioned and where the camera will be positioned. In order to block out a scene, it is best to break down the script in order to get a better understanding of it. Once you, as the director, have blocked out the scenes, the crew then need to be directed accordingly as well as the actors. The actors and crew should be blocked separately as their roles are completely different. Initially, I was giving more attention to the crew as this is the position I am more familiar with, however, the actors need just as much (if not, more) attention in order to make their acting work with the camera.
As well as having directing workshops, we had lighting and DSLR workshops. These were particularly useful for me as I always planned to use a DSLR for my shoot. In the DSLR workshops we leant how to manually change the settings such as ISO, exposure and focus in order to achieve specific looks. Due to conducting research into production design and breaking down my script, I knew that my scene was riddled with underlying feelings of love - this would somehow need to be reflected in the camera work / lighting / production design. I decided to go with a dreamy look, therefore the exposure would need to be a little brighter than usual in order to create that look. I also wanted the colours to be more vibrant (due to colour being one of my key directorial focuses) - by making the exposure slightly brighter, the colours would be more vibrant. I used the workshops as an opportunity to figure out which camera settings produced the specific look I required in my production. I also used the workshops as an opportunity to have a go with other camera equipment / accessories that I previously hadn't used. I then decided whether any of this equipment would be useful in my shoot. The lighting workshops were also a massive help. It was amazing to see how much a lighting can change the mood and effect conveyed within a scene. Due to my film taking place in natural daylight, I wanted to experiment with the tungsten lights in order to create a natural daylight look.
I decided to try and get the actors and locations sorted quite early on, however, I found finding and keeping actors on board very difficult meaning that this process took a lot longer than I hoped and caused a lot of stress. I posted an advert on Casting Call Pro, reached out to actors individually on CCP, and contacted people involved with drama societies, however I had no luck. I then resorted to asking other classmates for suggestions as to where to find actors. A third year recommended an actor to me that she had worked with before. I decided to contact this actor and ended up securing him for the role. Finding an actress for the female lead was a lot more straight forward. I ended up casting a model that I'd worked with before due to her having the right look for the role. I decided to use my own house for the location due to having to rearrange the set. I was able to position furniture where I needed and also bring extra props in.
Once the pre production preparations were sorted and the locations and actors were secured, I was finally ready for the shoot. In order to make the shoot run as smoothly as possible, I tested my ideas prior to the shoot day and created a precise schedule. Having everything planned (such as the camera angles, set design, costume etc) meant that I could focus my attention on directing when it came to shoot day.
My shoot went according to plan with only a few minor issues. The only issue that I wasn't able to resolve was my issues with sound. Initially I found directing the actors a little difficult because personally I am not very assertive or confident. However, once I had relaxed into my role as director, I managed to find the confidence to tell people how I wanted them to act. I managed to get all the coverage I needed and much more which gave me plenty of options when it came to editing.
I then put a rough cut together to produce a rough idea of how I wanted to piece my footage together. I then showed Mike and Simon the rough cut and gained feedback from this. I implemented their feedback to produce my fine cut. Again, I showed this to Simon and Mike and they provided further feedback. Once I followed their advice and changed my film once again, I finally produced the final cut of my project.
What worked?
- Due to my research into production design, set design, colour and costume, I was able to produce a very precise and visual idea of what I wanted my film to look like. This meant that my pre production went smoothly as I was able to use this research in order to figure out what I wanted in my own production design. Completing my pre production with a clear visualisation for my piece really enabled me to focus on directing on shoot day, rather than having to worry about these aspects of the film as well.
- I managed to assemble my footage in the way I had visualised it when it came to the edit. This demonstrates that my good organisation paid off as I was able to capture the exact footage I needed in order to create a product that was as close to my visualisation as possible.
- The location was what I had hoped it would be. For Mark's flat I was able to convey the idea of a large empty space that had art supplies dotted around - this helped to reflect Mark's personality. For Juliet's doorway I was able to set the holiday season by putting a Christmas decoration on the door knocker. I also felt this helped to add a homely vibe to her house as Christmas decorations often carry this connotation.
- Once I had secured my actors, my communication was good as I was able to keep in touch with them and keep them on board for the shoot. My actors showed up ready and prepared which allowed for a very smooth shoot day.
What didn't work?
- I think sound was an issue throughout my piece. Due to not being able to pick up the Tascam Kit in the morning before my shoot, I had to settle for using a rode microphone attached to the top of the DSLR camera. This meant that some of my sound contained noise / static and wasn't as crisp and clear as I wanted it to be. I feel that the sound really decreases the quality of my product as sound makes up 50% of it. However, I tried to recover my project by really focusing on the other aspects of the sound design (e.g. the background music for the wedding video, the background music for the presentation scene, the atmos in the presentation scene etc).
- Due to using natural lighting, there were changing levels of daylight meaning there were changing levels of light within my product. In order to resolve this issue, I should have changed the settings on the camera in line with the changing light. However, this issue was easily resolved in post production where I fiddled with the exposure levels.
What did I learn?
- Scheduling is key in order to make a production run smoothly and to get the best quality product. I thought my scheduling was very accurate, however, I hadn't accounted for the complication that would result in me having to pick up my actress rather than picking up the sound equipment. Therefore, in future I will make sure I have my equipment before the day of the shoot, so that if anything does go wrong on shoot day there should be time to resolve that without having to compromise other aspects.
- Again, I have learnt about the importance of sound. The quality of the sound is much less than I hoped which is frustrating as it brings the whole quality of my project down. Although I did put more focus on the other elements of sound design, it is still very obvious that the sound quality of the dialogue is poor. In future I will ensure that I use either a boom pole or the Tascam Kit to avoid getting noise / static and echoes.
What could I develop?
- Although most areas of my communication with my actors was good, I should have ensured that my actors could provide their own transport and would not unexpectedly need to be provided for. This means I should develop my communication skills to make sure that every single detail of shoot day has been organised.
- I should also develop my scheduling as this proved to be a slight issue. In future I will ensure that nothing on my schedule is likely to clash which will allow for a smooth shoot day with minimal issues.
Conclusion:
I was happy with the preparation I did before my shoot as I feel the amount of research I did really helped me to consider all aspects of my production. I was then able to organise my shoot precisely in order to get the product that I wanted. I am as happy with my product as I can be despite the obvious sound issues. I am happy with the look of the product but I feel that I have let myself down with the sound quality. However, I will take this on board in the next project to ensure that it does not happen again. Although it has been an issue for me this time, hopefully it will mean the quality of my future projects is better as I have learnt from this mistake.

Showing posts with label Directions. Show all posts
Showing posts with label Directions. Show all posts
Thursday, 2 March 2017

Wednesday, 1 March 2017
DIRECTIONS UNIT: Director's Statement
When I first chose to re direct Love Actually, I only had a few vague ideas of how I wanted to put my own creative spin on the production. However, after conducting a large amount of research, I managed to build upon these ideas and managed to create a clear visualisation of how I wanted my final product to turn out.
Casting
Initially, the only criteria I had for my cast was a 26-30 year old male and a female in her early 20s. I then decided to break down the script in order to really understand the characters. From the break down of the script I realised that my characters are very complex. Mark has a lot of underlying feelings but hardly ever allows these to show, whereas Juliet is a character who wears all her feelings on her sleeve.
From my analysis of the characters, I then formed character profiles / descriptions for them and posted them on casting call pro.
Mark:
Mark is a shy character who keeps his feeling buried deep. He feels awkward around Juliet due to his deep feelings for her that he can never reveal. This awkwardness has a tendency to come across as quite blunt and rude, leading him to be quite an isolated character. Deep down he is a hopeless romantic but feels he cannot express his feelings.
Juliet:
Juliet is an outgoing character who is keen to get along with everyone she meets. She is often bubbly, radiant and romantic. She is newly married to Peter, a man whom she deeply loves and will not allow anything to break them apart. She feels slightly uncomfortable around Mark, Peter's best friend (and best man at the wedding), as she feels that he does not like her. However, she still acts warm and friendly around him to try and break his seemingly hostile attitude towards her.
I decided to cast Dave as Mark due to him having the right look for the role and having a number of good examples of work on his showreel. In Love Actually, Mark is a very shy and awkward character but this doesn't take away from his kind and caring nature. Therefore, it was important to cast someone who was able to convey that kind nature whilst also being able to act uncomfortable around Juliet. Dave also looked the correct age for the role. This was important as the actors needed to look old enough that they were of the age where marriages are occurring and that they own their own houses. Here is a comparison between Mark from the original and from my production:

I decided to cast Ellie as Juliet as I needed to find an actress who has that innocent yet desirable nature. Juliet is a very naive character and I felt I really needed to capture this in my casting decision, therefore I decided to go for an actress who had that young, youthful, innocent look to her. Here is a comparison between Juliet from the original and my production:

Locations
I needed 3 locations for my shoot; Mark's flat, Juliet's doorway and some outdoor spaces for Juliet's wedding video.
For Mark's flat I wanted to create a very arty vibe similar to that in the film. I also wanted it to be quite empty to reflect the awkwardness and the uncomfortable nature of the scene. The negative space in the scene helps to resemble the space that has grown between the characters and therefore highlights the awkwardness of the situation. I discovered how to effectively use negative research by conducting research into set design and production design. I found that "negative space is an important video element for making characters stand out" [1] I decided to implement the use of negative space in order to make my characters and the distance apart from each other stand out in order to heighten the uncomfortable atmosphere.
For Juliet's doorway I wanted to create a homely feel to demonstrate that it is her's and her new husband's family home. I decided to hang a Christmas decoration on the door knocker in order to convey the idea that it is Christmas time as well as suggesting that Juliet and her new husband have spent time decorating their house together - showing their bond as a couple.
Production Design / Costume Design
I spent a great deal of time considering the costumes for the characters. Since I wanted to make colour a key directorial focus of mine, I decided to bring that in mainly through the costume and props. I opted to dress Juliet in red clothing (apart from the wedding scene). The red works to symbolise Mark's hidden feelings of love towards Juliet - the fact that she is wearing the colour shows her as the object of his affection. As well as love, red is often associated with danger and aggression [2] so I needed to use the right amount of red and also the right shade in order to convey the correct feeling (love rather than danger).

I also decided to use red props within the set design. This again was used to symbolise the theme of love.

My idea for using colour in the set design as well came from researching the set design of other romantic comedy films. Warm colours and fairy lights are often used in romantic settings in order to create that dreamy / fairytale atmosphere. As my scene itself is not a romantic scene I decided to just use splashes of red instead as the same feelings are there (they are just unknown and also unreciprocated). A scene that inspired me was this restaurant scene in The Fault In Our Stars.

Sound Design
I wanted the sound design in my production to be minimal yet effective. I chose to go with a subtle, ambient soundtrack through the first half of the first scene before the wedding video. This helps to lift the mood and keep the film from feeling flat. I chose a subtle soundtrack as I still wanted to create an awkward atmosphere. I did want to keep the first half of the first scene in silence (just with the dialogue of the characters) however, this felt flat and boring. Therefore the soundtrack helps to elevate the mood slightly whilst still keeping the awkward atmosphere. A lot of consideration went into the sound design of the second scene at Juliet's doorway. I muted the actual sound recorded from the microphone, and replaced it with different sounds such as outdoor summer ambience, bird sounds, faint cars and dogs barking in the background. This made for better sound quality as this meant there was no noise / static present from the sound recorded by the mic.
I chose the song for the wedding video as it is a love song. I felt that this would be suitable for a wedding video as a wedding is an event in which the love two people share for each other is celebrated. The song works in two ways in my production. The song symbolises the love at the wedding between Juliet and her husband, but it also works to symbolise the love Mark holds for Juliet. I added a muffled filter to this song and 'Silent Night' during the presentation scene in order to make it seem that the music is coming from the laptop speakers - making it obvious that it is diegetic sound.
Camera Approach
I wanted to include more wide shots in my production than Richard Curtis did originally as I really wanted to emphasise the space between the characters in order to suggest the awkwardness of the situation. Therefore, after the wedding video stops, the majority of the shots are shot in wide angle (whereas before the wedding video there were a lot of close ups / shot-reverse shots. I feel that this helped to change the mood of the scene and really emphasise the uncomfortable nature of the scene after the wedding video finishes.
I also decided to increase the exposure to slightly higher than normal during the wedding video in order to create an almost dream like / glowy look. This (like the love song) works in two ways. It helps to show the wedding as idealistic and dream like but also helps to convey Mark's affectionate feelings towards Juliet.
Editing
I wanted to make the editing in the first half of the first scene quicker than the editing in the last half of the first scene to really emphasise the awkwardness between the characters once the wedding video has finished. This slower pace helps to drag out the long silences which heightens the uncomfortable atmosphere. Pacing is a key part of editing, if the pacing is wrong then the whole scene will be thrown off and a completely different atmosphere could be created to that of the one you intended. [3] Therefore, the majority of my product has fairly normal paced editing to help make the slow cuts of the post-wedding video scene more noticeable and therefore have more of an effect.
Overall, my key focuses as a director were colour, mood and tone. I wanted to ensure colour was an important factor in my production and I feel that I have achieved this. This colour then has a knock on effect on the mood and the tone of the piece. The red colour helps to reflect Mark's feelings towards Juliet which helps to create a slightly romantic atmosphere. The mood and tone are also created by the pacing of the editing and the sound design of the piece. The ambient soundtrack pre wedding video and the lack of soundtrack post wedding video helps to shift the mood and tone of the piece. I am happy with my directorial decisions as I feel I was able to create my visualisation effectively.
Casting
Initially, the only criteria I had for my cast was a 26-30 year old male and a female in her early 20s. I then decided to break down the script in order to really understand the characters. From the break down of the script I realised that my characters are very complex. Mark has a lot of underlying feelings but hardly ever allows these to show, whereas Juliet is a character who wears all her feelings on her sleeve.
From my analysis of the characters, I then formed character profiles / descriptions for them and posted them on casting call pro.
Mark:
Mark is a shy character who keeps his feeling buried deep. He feels awkward around Juliet due to his deep feelings for her that he can never reveal. This awkwardness has a tendency to come across as quite blunt and rude, leading him to be quite an isolated character. Deep down he is a hopeless romantic but feels he cannot express his feelings.
Juliet:
Juliet is an outgoing character who is keen to get along with everyone she meets. She is often bubbly, radiant and romantic. She is newly married to Peter, a man whom she deeply loves and will not allow anything to break them apart. She feels slightly uncomfortable around Mark, Peter's best friend (and best man at the wedding), as she feels that he does not like her. However, she still acts warm and friendly around him to try and break his seemingly hostile attitude towards her.
I decided to cast Dave as Mark due to him having the right look for the role and having a number of good examples of work on his showreel. In Love Actually, Mark is a very shy and awkward character but this doesn't take away from his kind and caring nature. Therefore, it was important to cast someone who was able to convey that kind nature whilst also being able to act uncomfortable around Juliet. Dave also looked the correct age for the role. This was important as the actors needed to look old enough that they were of the age where marriages are occurring and that they own their own houses. Here is a comparison between Mark from the original and from my production:

I decided to cast Ellie as Juliet as I needed to find an actress who has that innocent yet desirable nature. Juliet is a very naive character and I felt I really needed to capture this in my casting decision, therefore I decided to go for an actress who had that young, youthful, innocent look to her. Here is a comparison between Juliet from the original and my production:

Locations
I needed 3 locations for my shoot; Mark's flat, Juliet's doorway and some outdoor spaces for Juliet's wedding video.
For Mark's flat I wanted to create a very arty vibe similar to that in the film. I also wanted it to be quite empty to reflect the awkwardness and the uncomfortable nature of the scene. The negative space in the scene helps to resemble the space that has grown between the characters and therefore highlights the awkwardness of the situation. I discovered how to effectively use negative research by conducting research into set design and production design. I found that "negative space is an important video element for making characters stand out" [1] I decided to implement the use of negative space in order to make my characters and the distance apart from each other stand out in order to heighten the uncomfortable atmosphere.
For Juliet's doorway I wanted to create a homely feel to demonstrate that it is her's and her new husband's family home. I decided to hang a Christmas decoration on the door knocker in order to convey the idea that it is Christmas time as well as suggesting that Juliet and her new husband have spent time decorating their house together - showing their bond as a couple.
Production Design / Costume Design
I spent a great deal of time considering the costumes for the characters. Since I wanted to make colour a key directorial focus of mine, I decided to bring that in mainly through the costume and props. I opted to dress Juliet in red clothing (apart from the wedding scene). The red works to symbolise Mark's hidden feelings of love towards Juliet - the fact that she is wearing the colour shows her as the object of his affection. As well as love, red is often associated with danger and aggression [2] so I needed to use the right amount of red and also the right shade in order to convey the correct feeling (love rather than danger).

I also decided to use red props within the set design. This again was used to symbolise the theme of love.

My idea for using colour in the set design as well came from researching the set design of other romantic comedy films. Warm colours and fairy lights are often used in romantic settings in order to create that dreamy / fairytale atmosphere. As my scene itself is not a romantic scene I decided to just use splashes of red instead as the same feelings are there (they are just unknown and also unreciprocated). A scene that inspired me was this restaurant scene in The Fault In Our Stars.

Sound Design
I wanted the sound design in my production to be minimal yet effective. I chose to go with a subtle, ambient soundtrack through the first half of the first scene before the wedding video. This helps to lift the mood and keep the film from feeling flat. I chose a subtle soundtrack as I still wanted to create an awkward atmosphere. I did want to keep the first half of the first scene in silence (just with the dialogue of the characters) however, this felt flat and boring. Therefore the soundtrack helps to elevate the mood slightly whilst still keeping the awkward atmosphere. A lot of consideration went into the sound design of the second scene at Juliet's doorway. I muted the actual sound recorded from the microphone, and replaced it with different sounds such as outdoor summer ambience, bird sounds, faint cars and dogs barking in the background. This made for better sound quality as this meant there was no noise / static present from the sound recorded by the mic.
I chose the song for the wedding video as it is a love song. I felt that this would be suitable for a wedding video as a wedding is an event in which the love two people share for each other is celebrated. The song works in two ways in my production. The song symbolises the love at the wedding between Juliet and her husband, but it also works to symbolise the love Mark holds for Juliet. I added a muffled filter to this song and 'Silent Night' during the presentation scene in order to make it seem that the music is coming from the laptop speakers - making it obvious that it is diegetic sound.
Camera Approach
I wanted to include more wide shots in my production than Richard Curtis did originally as I really wanted to emphasise the space between the characters in order to suggest the awkwardness of the situation. Therefore, after the wedding video stops, the majority of the shots are shot in wide angle (whereas before the wedding video there were a lot of close ups / shot-reverse shots. I feel that this helped to change the mood of the scene and really emphasise the uncomfortable nature of the scene after the wedding video finishes.
I also decided to increase the exposure to slightly higher than normal during the wedding video in order to create an almost dream like / glowy look. This (like the love song) works in two ways. It helps to show the wedding as idealistic and dream like but also helps to convey Mark's affectionate feelings towards Juliet.
Editing
I wanted to make the editing in the first half of the first scene quicker than the editing in the last half of the first scene to really emphasise the awkwardness between the characters once the wedding video has finished. This slower pace helps to drag out the long silences which heightens the uncomfortable atmosphere. Pacing is a key part of editing, if the pacing is wrong then the whole scene will be thrown off and a completely different atmosphere could be created to that of the one you intended. [3] Therefore, the majority of my product has fairly normal paced editing to help make the slow cuts of the post-wedding video scene more noticeable and therefore have more of an effect.
Overall, my key focuses as a director were colour, mood and tone. I wanted to ensure colour was an important factor in my production and I feel that I have achieved this. This colour then has a knock on effect on the mood and the tone of the piece. The red colour helps to reflect Mark's feelings towards Juliet which helps to create a slightly romantic atmosphere. The mood and tone are also created by the pacing of the editing and the sound design of the piece. The ambient soundtrack pre wedding video and the lack of soundtrack post wedding video helps to shift the mood and tone of the piece. I am happy with my directorial decisions as I feel I was able to create my visualisation effectively.
[1] (2013) Available at: https://www.videomaker.com/article/c10/15681-how-to-effectively-use-in-negative-space-in-your-shots (Accessed: 1 March 2017).
[2] Fusco, J. (2016) Watch: The psychology of color in film. Available at: http://nofilmschool.com/2016/06/watch-psychology-color-film (Accessed: 1 March 2017).
[3] Hockrow, R. (2014) Peachpit. Available at: http://www.peachpit.com/articles/article.aspx?p=2233986 (Accessed: 1 March 2017).
Tuesday, 28 February 2017
DIRECTIONS UNIT: Shooting 'Love Actually' - Issues and changes
Although I had thoroughly planned out my shoot, I still came across some slight issues on shoot day.
Issue 1: The Sound
I had booked out the Tascam Kit to use with my DSLR camera. However, my actress was unable to provide her own transport to my location so instead of picking up the sound equipment, I had to prioritise and pick up my actress instead. This meant that instead of using the Tascam Kit, I had to use a Rode Mic attached to the top of the DSLR. Although this was better than using the built in microphone on the DSLR, the sound quality was still not great. In future I will make sure picking up my equipment and my actors don't clash.

Issue 2: The Camera Angle
We set up the camera how I had planned, however, it looked slightly odd when the actors were acting out the scene. There was a large space on the right hand side of the screen where no action was occurring. Furthermore, when the actress turned her head in order to carry out the dialogue with the actor, her face was completely turned away from the camera. I decided to make the camera more central and also move it slightly higher up on the tripod. This ensured that the action was the main focus of the frame, both actors' faces could be seen and that the actors heads weren't getting slightly cut off when they moved around in the frame.

Issue 3: The movement of the actress to retrieve the DVD
Due to testing out the action and the shots before the day of the shoot, I knew that capturing this footage would be difficult to get right. I needed the actress to walk over to the DVD collection, pick one out and then hold it up and say a line of dialogue. Getting the shot for this was tricky as from one angle the actress would have her back to the camera, from another angle she would be blocking the actor and in another angle she would be speaking away from the camera and microphone.

The final image of these four images was the one I finally picked. I resolved the issue by making the other actor move slightly as she turned around with the disc in her hand. I also directed the actress slightly differently so that she turned further around - this meant she was not facing away from the camera.
Issue 4: Juliet running up behind Mark
The final part of the scene at Juliet's doorway involves Juliet running up behind Mark to give him a kiss / hug. I decided to film this from the angle facing the doorway so that we could see Juliet's approach. However, this made it look awkward and unnatural. I hadn't actually thought of filming it from the other direction which probably would have made the scene look more natural and give a better look than the idea I settled with. Instead, I decided to leave Juliet at the doorway and shout after Mark. Although the shout works better than the awkward run, it still didn't have the intended effect. Juliet doesn't sound as sympathetic towards him and Mark looks like he's just ignoring her instead of deciding to move on from her.

I managed to resolve most of these issues except from the sound issue. It is important to either use a boom pole or a tascam kit in order to record the sound as this captures much clearer, better quality dialogue. The sound captured by the Rode Mic in my piece is lower quality than I hoped for, meaning there is some noise / static and some echoes of the characters' dialogue. Using better sound equipment next time would improve this, therefore I will learn from this and make collecting sound equipment a priority in my scheduling.
Issue 1: The Sound
I had booked out the Tascam Kit to use with my DSLR camera. However, my actress was unable to provide her own transport to my location so instead of picking up the sound equipment, I had to prioritise and pick up my actress instead. This meant that instead of using the Tascam Kit, I had to use a Rode Mic attached to the top of the DSLR. Although this was better than using the built in microphone on the DSLR, the sound quality was still not great. In future I will make sure picking up my equipment and my actors don't clash.

Issue 2: The Camera Angle
We set up the camera how I had planned, however, it looked slightly odd when the actors were acting out the scene. There was a large space on the right hand side of the screen where no action was occurring. Furthermore, when the actress turned her head in order to carry out the dialogue with the actor, her face was completely turned away from the camera. I decided to make the camera more central and also move it slightly higher up on the tripod. This ensured that the action was the main focus of the frame, both actors' faces could be seen and that the actors heads weren't getting slightly cut off when they moved around in the frame.

Issue 3: The movement of the actress to retrieve the DVD
Due to testing out the action and the shots before the day of the shoot, I knew that capturing this footage would be difficult to get right. I needed the actress to walk over to the DVD collection, pick one out and then hold it up and say a line of dialogue. Getting the shot for this was tricky as from one angle the actress would have her back to the camera, from another angle she would be blocking the actor and in another angle she would be speaking away from the camera and microphone.

The final image of these four images was the one I finally picked. I resolved the issue by making the other actor move slightly as she turned around with the disc in her hand. I also directed the actress slightly differently so that she turned further around - this meant she was not facing away from the camera.
Issue 4: Juliet running up behind Mark
The final part of the scene at Juliet's doorway involves Juliet running up behind Mark to give him a kiss / hug. I decided to film this from the angle facing the doorway so that we could see Juliet's approach. However, this made it look awkward and unnatural. I hadn't actually thought of filming it from the other direction which probably would have made the scene look more natural and give a better look than the idea I settled with. Instead, I decided to leave Juliet at the doorway and shout after Mark. Although the shout works better than the awkward run, it still didn't have the intended effect. Juliet doesn't sound as sympathetic towards him and Mark looks like he's just ignoring her instead of deciding to move on from her.

I managed to resolve most of these issues except from the sound issue. It is important to either use a boom pole or a tascam kit in order to record the sound as this captures much clearer, better quality dialogue. The sound captured by the Rode Mic in my piece is lower quality than I hoped for, meaning there is some noise / static and some echoes of the characters' dialogue. Using better sound equipment next time would improve this, therefore I will learn from this and make collecting sound equipment a priority in my scheduling.
DIRECTIONS UNIT: Shooting 'Love Actually'
After weeks of planning, I shot my re creation of Love Actually on the 13th February.
Everything had been thoroughly planned out in order to make the day run as smoothly as possible.
8:30 am - I picked up my actress from her house and drove her back to the location.
9:30 am - My crew (Alex Hargood) turned up on time.
9:40 am - I gave my actress her first costume (a white bardot top, a flower headband and a veil) to get changed into ready for the shoot of the wedding video. We then started to film the first clips for the wedding video. The majority of these were shot in the back garden of my house, however, a few of them were shot just in front of the church in my local area. This took about 45 minutes - 1 hour to film.
10: 30 am - We finished shooting the clips for the wedding video. I then gave my actress her second costume (a red top with flower embroidery, a red jacket and jeans) to get changed into ready for the first scene. Whilst we waited for the other actor to turn up, I ran through the script with her and blocked out her movements with her. My actress was very nervous, however, as the day progressed she became more relaxed and comfortable in the role.
11:00 am - My actor showed up on time, ready in his outfit for the first scene (a big jumper and jeans). I then introduced him to the actress and had a 5-10 minute chat with both of them so that a calm and comfortable atmosphere was created.
11:20 am - I then ran through the script with the actor and blocked out his movements with him. This was fairly straight forward due to the markings I had put on the floor to show their positions. I had also sent my actors the screenplay for the shoot a week prior to shooting so that they were already familiar with their lines.
11:30 am - I then decided to run through the whole scene with the actors so that they were comfortable and confident with what they needed to do before we started filming. I also showed them where I would be standing as the director and where the crew, camera and microphone would be. This just helped to familiarise the actors with the set.
11:50 am - We were then ready to shoot the first take of the first scene. However, once we shot this, we realised the camera could have been positioned slightly differently in order to get the optimum coverage of the scene.
12:00 pm - We then set up the camera slightly higher on the tripod, this gave a much better look as 'Juliet's' head was not cut off when she moved closer to the chair to sit down. We then shot the second take of the first scene. This visually looked better than the first scene, however, the actors made a few errors in their dialogue (errors which could not be fixed without reshooting).
12:10 pm - We then decided to go in for the third take. This take again had errors in dialogue so we reshot it again.
12:20 pm - On the fourth take we finally got the shot with all the correct dialogue.
12:50 pm - We then decided to move on to getting all the other coverage for the shoot. This other coverage included; both the characters' entrances to the scene, medium / close up shots for both of the characters during the scene, another wide angle shot for the whole scene, close up of the DVD collection and an overhead shot of putting the DVD into the DVD player.
13:20 pm - We then decided to break for some food. We also took this time to get to know each other better, this really helped the second half of the shoot to flow better as we were all a lot more comfortable around each other - this meant the performances from the actors was a lot more natural which gave a better overall look.
13:50 pm - We then decided to get straight back into shooting. I gave the actress her third outfit (a red jumper and jeans) for her to get changed into for the scene at the door. The actor just wore the same outfit as the first scene but with a coat over the top.
14:00 pm - We then set up the camera on the tripod at the same height as the actors. We then also put a dead cat windshield on the microphone in order to prevent the wind interfering with the sound too much. We then decided to start shooting the first take of the second scene. I decided to shoot it all with the camera facing 'Mark' first. This only took a few takes due to the scene having no dialogue whatsoever for the actor. I decided to get the scene in a variety of different shot sizes.
14:20 pm - After getting all the footage facing 'Mark', I then decided to get all the footage of 'Juliet'. Again this was really simple due to her only having a couple of lines of dialogue. I decided to get the footage in a variety of different shot sizes as well.
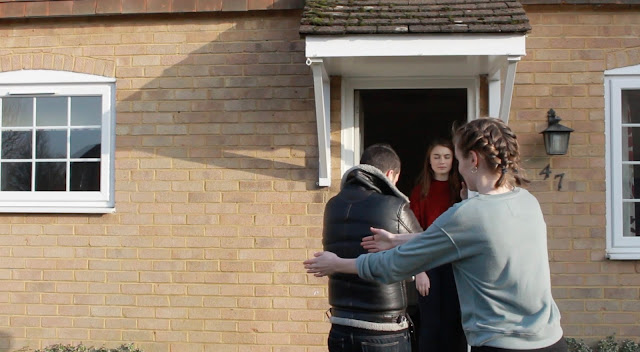
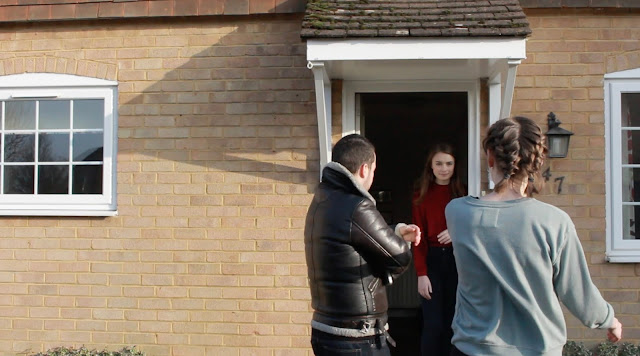
14:35 pm - We ran into a little bit of a problem when it came to 'Juliet' running up behind 'Mark' at the end of the scene. Whichever way we shot it, it looked awkward and unnatural. Therefore, we decided to change the ending slightly and just have her saying "wait" at the door.
14:45 pm - Before letting the actors go, I decided to go over the footage to check that I had everything that I needed. I decided that I needed a little bit more footage at the door.
15:00 pm - After getting the extra footage, I decided to wrap the shoot.
After reviewing all the footage properly at the end of the day, I realised that the quality of the sound in my production was not as good as it could have been. However, I assumed this would be the case as I was unable to get another person to be my sound operator so I had to make do with a rode microphone on top of a DSLR. In future, I will make sure my crew are secured so that I do not run into the same issue.
Everything had been thoroughly planned out in order to make the day run as smoothly as possible.
8:30 am - I picked up my actress from her house and drove her back to the location.
9:30 am - My crew (Alex Hargood) turned up on time.
9:40 am - I gave my actress her first costume (a white bardot top, a flower headband and a veil) to get changed into ready for the shoot of the wedding video. We then started to film the first clips for the wedding video. The majority of these were shot in the back garden of my house, however, a few of them were shot just in front of the church in my local area. This took about 45 minutes - 1 hour to film.
10: 30 am - We finished shooting the clips for the wedding video. I then gave my actress her second costume (a red top with flower embroidery, a red jacket and jeans) to get changed into ready for the first scene. Whilst we waited for the other actor to turn up, I ran through the script with her and blocked out her movements with her. My actress was very nervous, however, as the day progressed she became more relaxed and comfortable in the role.
11:00 am - My actor showed up on time, ready in his outfit for the first scene (a big jumper and jeans). I then introduced him to the actress and had a 5-10 minute chat with both of them so that a calm and comfortable atmosphere was created.
11:20 am - I then ran through the script with the actor and blocked out his movements with him. This was fairly straight forward due to the markings I had put on the floor to show their positions. I had also sent my actors the screenplay for the shoot a week prior to shooting so that they were already familiar with their lines.
11:30 am - I then decided to run through the whole scene with the actors so that they were comfortable and confident with what they needed to do before we started filming. I also showed them where I would be standing as the director and where the crew, camera and microphone would be. This just helped to familiarise the actors with the set.
11:50 am - We were then ready to shoot the first take of the first scene. However, once we shot this, we realised the camera could have been positioned slightly differently in order to get the optimum coverage of the scene.
12:00 pm - We then set up the camera slightly higher on the tripod, this gave a much better look as 'Juliet's' head was not cut off when she moved closer to the chair to sit down. We then shot the second take of the first scene. This visually looked better than the first scene, however, the actors made a few errors in their dialogue (errors which could not be fixed without reshooting).
12:10 pm - We then decided to go in for the third take. This take again had errors in dialogue so we reshot it again.
12:20 pm - On the fourth take we finally got the shot with all the correct dialogue.
12:50 pm - We then decided to move on to getting all the other coverage for the shoot. This other coverage included; both the characters' entrances to the scene, medium / close up shots for both of the characters during the scene, another wide angle shot for the whole scene, close up of the DVD collection and an overhead shot of putting the DVD into the DVD player.
13:20 pm - We then decided to break for some food. We also took this time to get to know each other better, this really helped the second half of the shoot to flow better as we were all a lot more comfortable around each other - this meant the performances from the actors was a lot more natural which gave a better overall look.
13:50 pm - We then decided to get straight back into shooting. I gave the actress her third outfit (a red jumper and jeans) for her to get changed into for the scene at the door. The actor just wore the same outfit as the first scene but with a coat over the top.
14:00 pm - We then set up the camera on the tripod at the same height as the actors. We then also put a dead cat windshield on the microphone in order to prevent the wind interfering with the sound too much. We then decided to start shooting the first take of the second scene. I decided to shoot it all with the camera facing 'Mark' first. This only took a few takes due to the scene having no dialogue whatsoever for the actor. I decided to get the scene in a variety of different shot sizes.
14:20 pm - After getting all the footage facing 'Mark', I then decided to get all the footage of 'Juliet'. Again this was really simple due to her only having a couple of lines of dialogue. I decided to get the footage in a variety of different shot sizes as well.
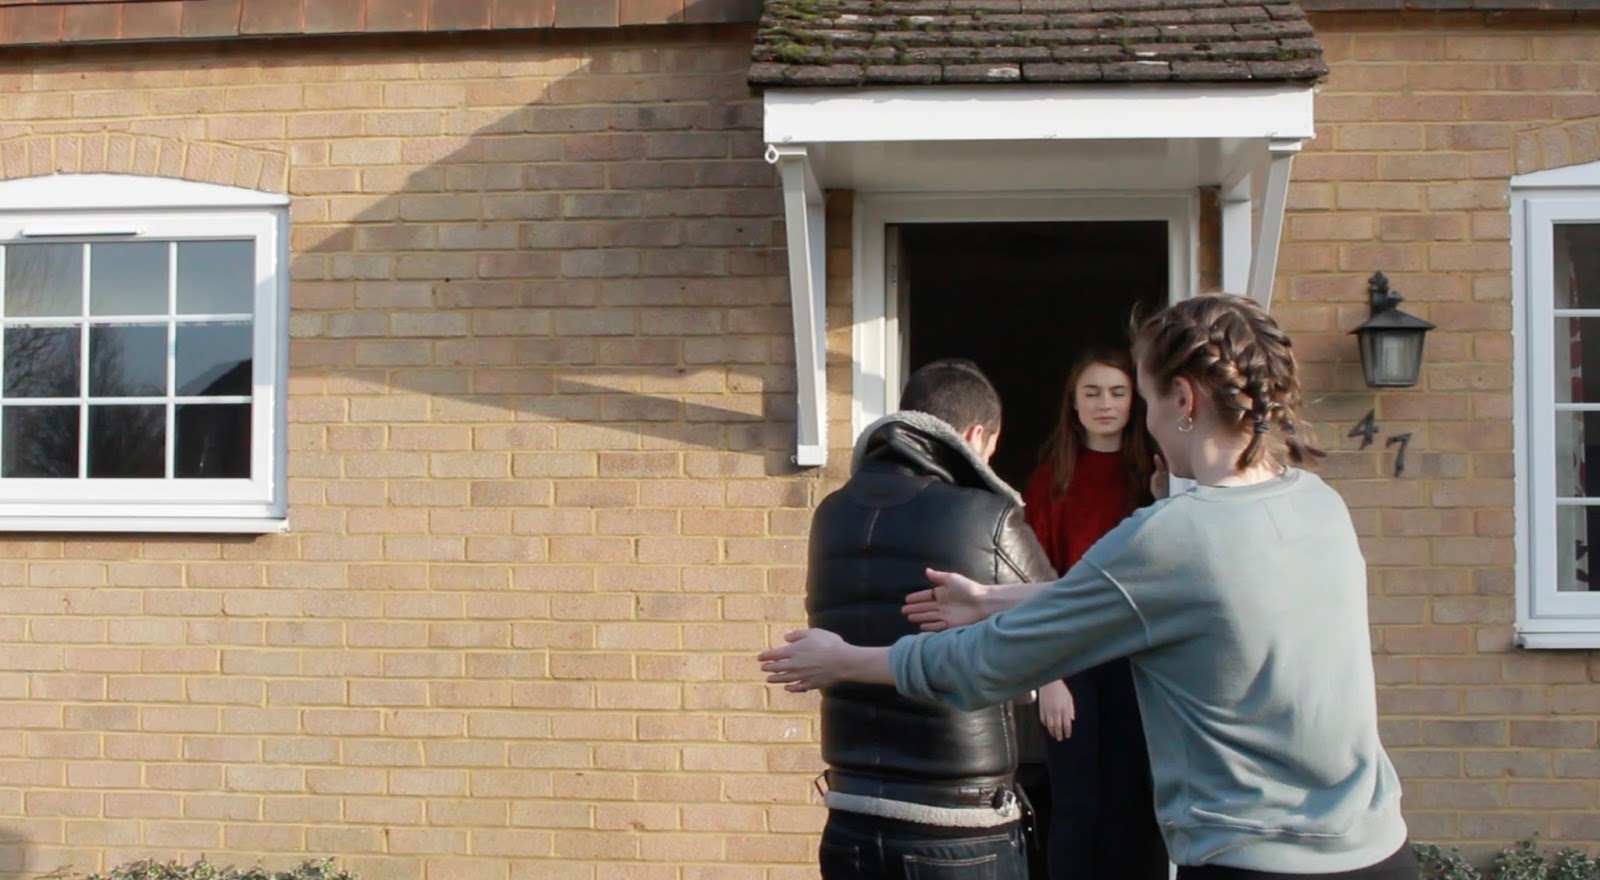
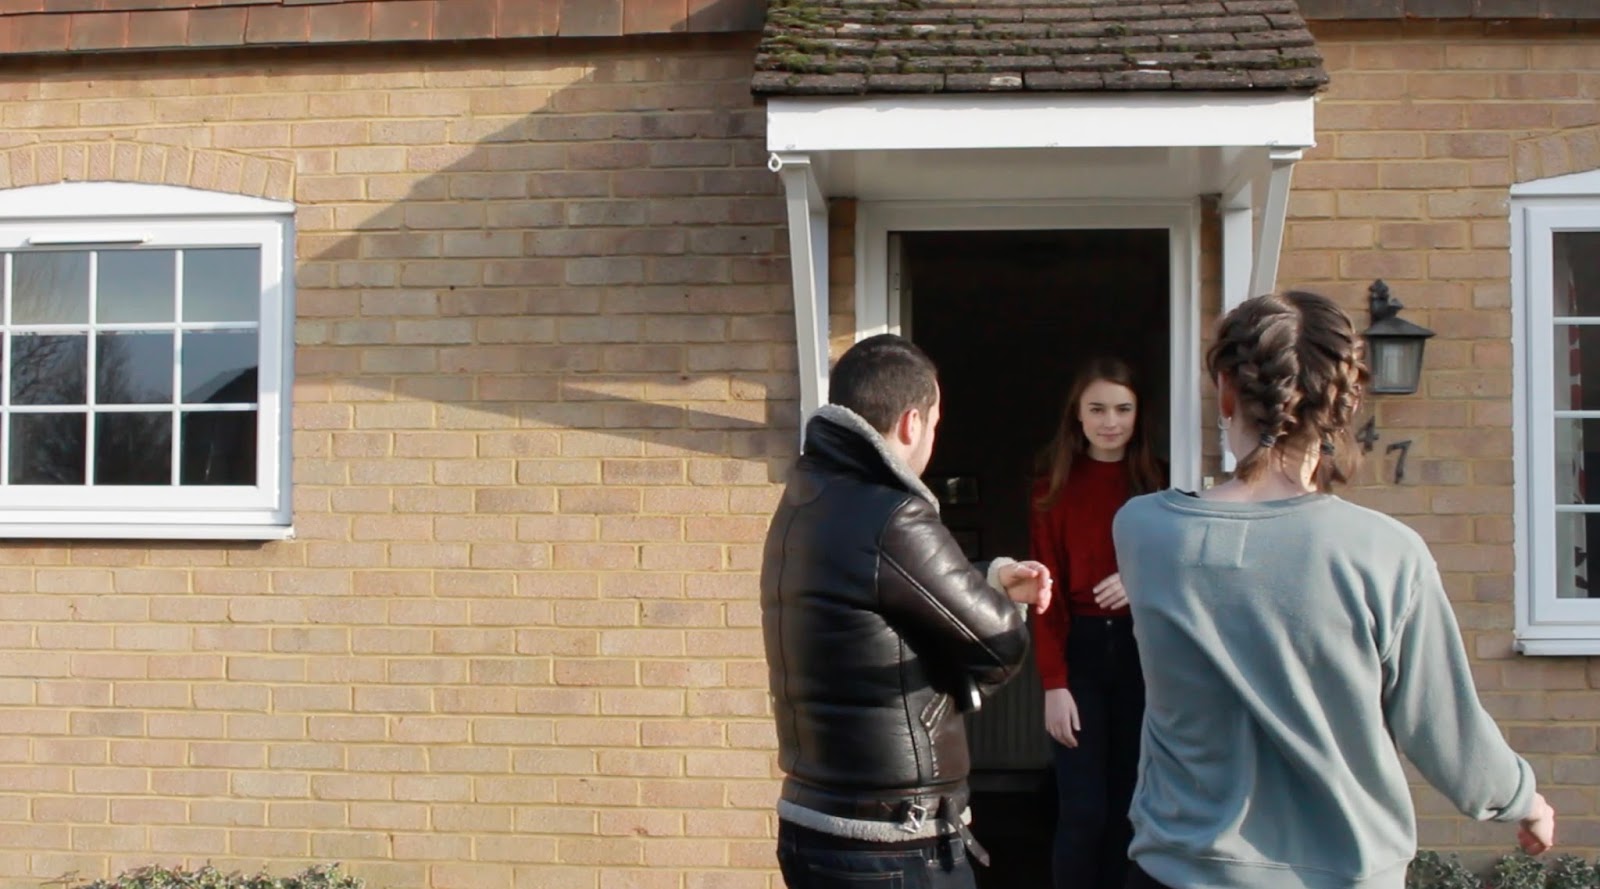
14:35 pm - We ran into a little bit of a problem when it came to 'Juliet' running up behind 'Mark' at the end of the scene. Whichever way we shot it, it looked awkward and unnatural. Therefore, we decided to change the ending slightly and just have her saying "wait" at the door.
14:45 pm - Before letting the actors go, I decided to go over the footage to check that I had everything that I needed. I decided that I needed a little bit more footage at the door.
15:00 pm - After getting the extra footage, I decided to wrap the shoot.
After reviewing all the footage properly at the end of the day, I realised that the quality of the sound in my production was not as good as it could have been. However, I assumed this would be the case as I was unable to get another person to be my sound operator so I had to make do with a rode microphone on top of a DSLR. In future, I will make sure my crew are secured so that I do not run into the same issue.
DIRECTIONS UNIT: Preparing for shoot day / testing ideas
After breaking down my script, storyboarding my scenes, creating a shot list and blocking out my scenes, I decided to prepare for the actual shoot day itself.
I started by making a call sheet for my actors. Here's a copy:
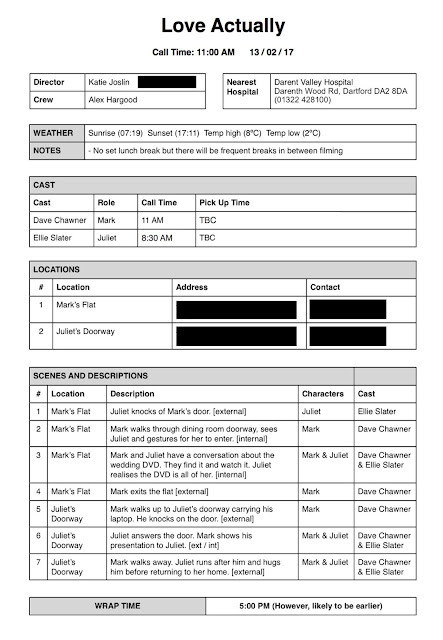 I sent these to the actors 5 days before the shoot along with my new adapted screenplay. I then kept in contact with the actors so that they were secured for the shoot.
I then arranged travel with the actors. After finding out their locations, I recommended the best travel option for them and discussed the rough price of their travel so this could be sorted out.
Finally, a couple nights before my shoot, I decided to try out my camera angles with my family. This enabled me to see whether the shots that I had visualized and storyboarded would actually work when put into action.
Here are a couple of examples:

This is the opening interaction between Mark and Juliet. I found that this shot worked, I would just need to make sure the camera was set up in the same position (as any slight difference could make the shot look unbalanced with too much action occurring on the left hand side of the frame, or if the tripod was set up too low then their heads would be cut off).

I experimented with the shot where Juliet crosses over to the DVD collection. I attempted to film it handheld and follow Juliet as she walked over. However, this shot felt very unnatural and out of place due to all of the other shots being static. I also attempted to pan on the tripod to follow Juliet, however, this again looked odd.

I found out that the majority of the shots I had storyboarded would work fine, however, there was one shot that I found particularly difficult to work with. This shot was the one where Juliet crosses over to the DVD collection and then turns back around to Mark. I found it difficult to shoot this scene without the actors blocking each other. The only way I could see myself getting a clearer shot of this scene would be to cross the line which ultimately would have been a worse decision than keeping the actors slightly blocking each other.
In the end, I decided to try and direct the actors in such a way that their action was not being blocked by each other. I managed to do this by getting Mark to stand further back and move slightly when Juliet would have originally blocked him. In my storyboard, I also planned to film more coverage doing this sequence of action. I planned to film Juliet picking out the DVD in a close up shot of the row of DVDs, therefore, if any of the coverage from the wide shot of both of them is unusable, I have this coverage to replace it with instead.
Although this still didn't make the perfect shot, it was the best I could get due to the space limitations in the location. I had considered changing the whole arrangement of the room around but this seemed to create more problems than it solved.
As this all meant that the actors needed to be in specific spots for the scenes to work, I went about putting colored markers on the floor so that they would be in the correct positions when it came to filming:


Once this was all planned out, I just needed to wait for the shoot day itself. I decided to give myself a generous amount of time in which to shoot the scenes just incase I encountered similar problems with the positioning of the actors.
I started by making a call sheet for my actors. Here's a copy:
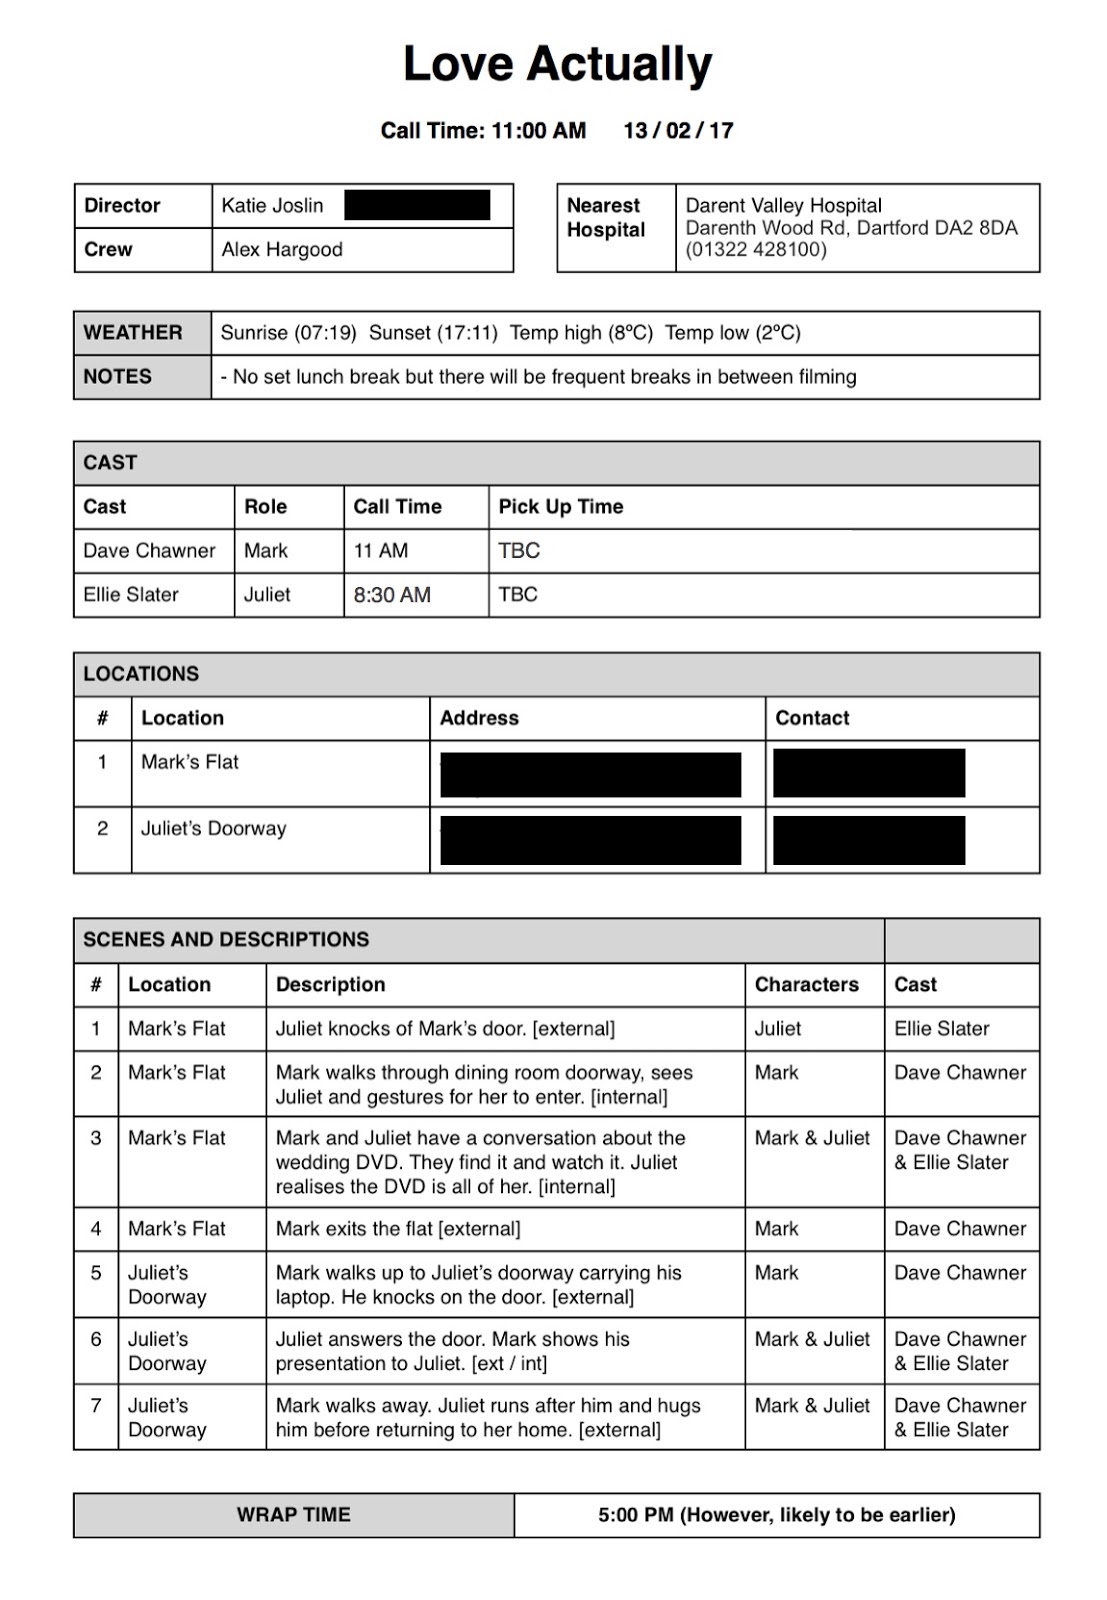
I then arranged travel with the actors. After finding out their locations, I recommended the best travel option for them and discussed the rough price of their travel so this could be sorted out.
Finally, a couple nights before my shoot, I decided to try out my camera angles with my family. This enabled me to see whether the shots that I had visualized and storyboarded would actually work when put into action.
Here are a couple of examples:

This is the opening interaction between Mark and Juliet. I found that this shot worked, I would just need to make sure the camera was set up in the same position (as any slight difference could make the shot look unbalanced with too much action occurring on the left hand side of the frame, or if the tripod was set up too low then their heads would be cut off).

I experimented with the shot where Juliet crosses over to the DVD collection. I attempted to film it handheld and follow Juliet as she walked over. However, this shot felt very unnatural and out of place due to all of the other shots being static. I also attempted to pan on the tripod to follow Juliet, however, this again looked odd.

I found out that the majority of the shots I had storyboarded would work fine, however, there was one shot that I found particularly difficult to work with. This shot was the one where Juliet crosses over to the DVD collection and then turns back around to Mark. I found it difficult to shoot this scene without the actors blocking each other. The only way I could see myself getting a clearer shot of this scene would be to cross the line which ultimately would have been a worse decision than keeping the actors slightly blocking each other.
In the end, I decided to try and direct the actors in such a way that their action was not being blocked by each other. I managed to do this by getting Mark to stand further back and move slightly when Juliet would have originally blocked him. In my storyboard, I also planned to film more coverage doing this sequence of action. I planned to film Juliet picking out the DVD in a close up shot of the row of DVDs, therefore, if any of the coverage from the wide shot of both of them is unusable, I have this coverage to replace it with instead.
Although this still didn't make the perfect shot, it was the best I could get due to the space limitations in the location. I had considered changing the whole arrangement of the room around but this seemed to create more problems than it solved.
As this all meant that the actors needed to be in specific spots for the scenes to work, I went about putting colored markers on the floor so that they would be in the correct positions when it came to filming:


Once this was all planned out, I just needed to wait for the shoot day itself. I decided to give myself a generous amount of time in which to shoot the scenes just incase I encountered similar problems with the positioning of the actors.
DIRECTIONS UNIT: (Production) Editing and Sound Design
Once I had captured all of my footage, I began to assemble it into a rough cut. This involved using my storyboard which I had created in the pre production phase and assembling the clips into the order in which I wanted them.
To begin with, all the shots were separate from each other on the timeline. I knew this would not be how I wanted the finished product to turn out, however, I needed to get the clips into some kind of rough order. Once they footage was all assembled, I could then begin overlapping some of the dialogue and inserting reaction shots in over the top of some of the dialogue.
When gaining feedback from my rough cut, Mike suggested that overlapping the shots would help the flow of the edit and make the conversation appear more natural. I therefore continued overlapping pieces of my audio and video.
The next thing I did was apply video effects to the wedding video in order to make it clear that it was a recorded video. I used a black camera frame effect in order to give the impression of watching the video on a laptop screen and I used a camcorder frame effect in order to give the impression that the video was shot on a camcorder.

Once these effects had been applied, I decided to adjust the exposure and add a glow effect to the wedding video. My aim for this was to create a glowy, dream-like effect in order to convey the romance of the wedding whilst also conveying Mark’s feelings for Juliet.

The edit for the wedding video is quite rapid to give the idea that Mark was just filming snippets of the wedding. This fast editing also makes the characters’ reactions more immediate to the footage (this was some feedback I received from Simon when showing both my rough and fine cut).
After the wedding video footage was complete, I decided to apply some colour correction to the other footage that takes place in Mark’s flat. Due to the varying levels of natural daylight, some of the footage turned out a lot darker than other parts. I decided to increase the exposure for the darker images in order to make them match the brighter images - this helps with the continuity of the editing.

Sound is something I struggled with all the way through the production. I managed to reduce some of the background noise but the voices are still slightly echoey - something which unfortunately cannot be resolved. I decided to compensate for this by really focusing on the sound design for the rest of the product.
One of the first pieces of sound design I focused on was the sound for the wedding video. I found a rights free track that suited the wedding video perfectly. I then adjusted the audio to make it quieter and applied a muffled audio effect to give the impression that the music is playing from the laptop. As well as the music, I added sound effects such as the wedding bells and atmospheric sounds such as birds.

I then moved on to the sound design for the scene at Juliet’s doorway. As there is very little dialogue in this scene, I muted all of the clips (leaving just the few lines of dialogue). This meant that the background noise which was reducing the quality of my work could be eliminated in this scene. I replaced the sound with atmospheric sounds e.g. outdoor ambience, bird song, dogs barking and the sound of cars. I also re-recorded the sound of Mark tapping on the laptop to move the slides on. I did try leaving these sounds out but the scene ends up looking odd as it just feels like there’s something missing. With the added tapping, it now makes more sense to the audience that he is manually moving the slides of the presentation on.
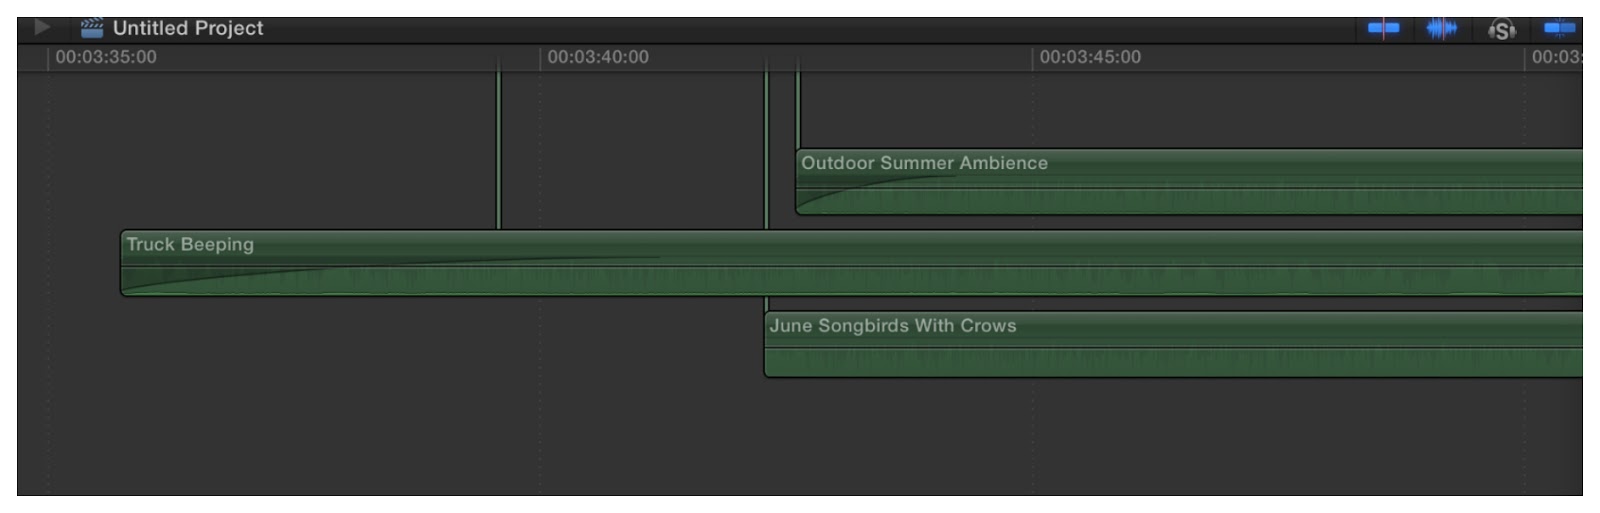
As feedback from my fine cut, Simon suggested adding background music to the scene before the wedding video as the mood is rather flat. I didn’t totally agree with this suggestion as every piece of background music I tried seemed to distract the attention away from the conversation between the characters. However, I eventually managed to find some calm, ambient sound which helped to lift the mood whilst not distracting the attention away from the conversation.
Overall, I am happy with my edit. I think I produced the best product that I could with the poor quality sound and varying levels of light. I resolved many of the sound issues in post production but the dialogue is still left with an echo and a low level of background noise / static.
DIRECTIONS UNIT: Final Cut
After implementing all the feedback I had received over the sessions, I finally produced the final version of my product. Here it is:
Monday, 27 February 2017
DIRECTIONS UNIT: Second Cut / Fine Cut and More Feedback
After getting feedback on my rough cut, I decided to get straight on and implement their advice.
I added titles to the start of the piece, however, I still need to add the title sequence on to the front.
I also changed it so that during their initial conversation, the camera stays on quite close angles, rather than switching between wide and close shots.
I also added in the sequences which I hadn't filmed yet.
I decided to change the frame around the wedding video to make it even more evident that it was a recorded video. I also shortened the wedding video to make the characters' reactions to it more immediate.
I flipped the door scene so that their eyelines now match, this makes the scene more comfortable to watch.
This then formed my fine cut:
I then received some more feedback about my fine cut:
It may be a good idea to put in some background music before the wedding video begins as at the moment it is quite flat until this moment.
I need to cut the wedding video down slightly more to leave less space between their reactions.
I also need to include a close up of Mark when I show a close up of Juliet looking upwards towards him. The black screen at the end of the video also lasts slightly too long, this makes her reaction of "you never talk to me..." quite delayed. I will reduce the time of this black screen.
In the scene at Juliet's doorway, I will get rid of the background noise and instead replace it with some other outdoor / ambient noises.
I also need to do some colour correction and work with the exposure of some of the scenes. Once I have sorted these things out and the issues with the sound, I will finally have my final cut.
Monday, 20 February 2017
DIRECTIONS UNIT: Rough Cut and Feedback
I decided to get straight into editing my footage in order to produce a rough cut.
Feedback and changes:
I received quite a bit of feedback on my rough cut which I will put into action straight away.
- I used a mix of wide and close shots in the opening conversation between Mark and Juliet. This gave quite an uncomfortable feel and didn't work with the content of the scene.
To change this I will start with a wide angle between the characters and then keep the following conversation in close up and shot-reverse type shots.
- The wedding video took up quite a lot of time, making their reactions to the video look a bit unrealistic. I did put quite a lot of the wedding video in slow motion to give it a more cinematic look, however, this also made it look a bit juddery.
To change this I will change the speed of the video back to normal and cut a few bits of the video out. This way, their reactions seem more immediate and the general flow of the video works better. It will also make it more believable as a wedding video (as opposed to a video just of her, which is what it looks like at the moment).
- In the scene at the door, there were some issues with eye lines and the direction in which the characters were looking. Both characters were looking from screen right to screen left, which doesn't make sense visually.
To change this, I will flip the footage of 'Juliet'. This will make her look from screen left to screen right which will make more visual sense to the audience. I was concerned that this may make the footage look slightly weird and unnatural, however, I will attempt it and see what effect it creates.
- As Mark walks away, it would look better if I were to change the angle so that he walks away from the camera. Therefore, once he has turned around, I will change to the other camera angle.
Feedback and changes:
I received quite a bit of feedback on my rough cut which I will put into action straight away.
- I used a mix of wide and close shots in the opening conversation between Mark and Juliet. This gave quite an uncomfortable feel and didn't work with the content of the scene.
To change this I will start with a wide angle between the characters and then keep the following conversation in close up and shot-reverse type shots.
- The wedding video took up quite a lot of time, making their reactions to the video look a bit unrealistic. I did put quite a lot of the wedding video in slow motion to give it a more cinematic look, however, this also made it look a bit juddery.
To change this I will change the speed of the video back to normal and cut a few bits of the video out. This way, their reactions seem more immediate and the general flow of the video works better. It will also make it more believable as a wedding video (as opposed to a video just of her, which is what it looks like at the moment).
- In the scene at the door, there were some issues with eye lines and the direction in which the characters were looking. Both characters were looking from screen right to screen left, which doesn't make sense visually.
To change this, I will flip the footage of 'Juliet'. This will make her look from screen left to screen right which will make more visual sense to the audience. I was concerned that this may make the footage look slightly weird and unnatural, however, I will attempt it and see what effect it creates.
- As Mark walks away, it would look better if I were to change the angle so that he walks away from the camera. Therefore, once he has turned around, I will change to the other camera angle.
Saturday, 11 February 2017
DIRECTIONS UNIT: (Research) TV Drama: Stranger Things
Stranger Things
Directors: The Duffer Brothers

From the very first episode of Stranger Things I was hooked. The creators and directors of the successful series, The Duffer Brothers, gained inspiration from almost everywhere. From Spielberg to Stephen King to Star Wars, Stranger Things includes homages to all of these and more.
The Title / Font
The title font used for the title sequence and the titles within the show (e.g. for dates and locations) is a modified version of ITC Benguiat. [1] From the very first title in the very first episode, there is definitely a sense of a Stephen King type of aesthetic. This is due to the font and the colour looking very similar to that of the one used on Stephen King's paperbacks.

This works very well as a narrative tool as it immediately sets up the audience with ideas of what to expect. The font connotes the sense of horror, suspense and supernatural fiction that is present within Stephen King's novels and therefore sets the audience up to expect the same from the show. This was a very simple directorial decision which has proved to be very effective.
Due to the show being a Netflix exclusive, and the convention that people tend to bing watch the shows on Netflix, the title sequence has been kept relatively short so that it can still deliver its desired effect whilst not taking up too much of the viewer's time and therefore frustrating them. Although the title sequence itself is short, everything within the sequence moves slowly and smoothly. This, along with the synth music behind it, helps to build up an ominous atmosphere. A sense of mystery is also created by the title sequence as it begins with close ups of the letters, we do not see the entire title until the end of the sequence. This helps to allude to the mysterious and ominous atmosphere within the show.
The colour of the titles is also significant as it alludes to the perpetual state of danger the characters find themselves in throughout the show. The titles also have a flickering effect, this helps to add to the sense of 80s nostalgia established in the series as it is not too dissimilar to the flicker of images on an old video tape.
The Visual Style - Colour, lighting and mise en scene
Stranger Things was shot on Red Epic Dragon using Zeiss Prime Lenses. [2] A film grain effect is used over the title sequence in order to establish the sense of nostalgia the series aims to evoke, however, this same film grain is not used in the footage in the actual show as this would compromise the 4K resolution of the series. Although, the directors did still want to evoke a sense of nostalgia through the series, they achieved this through lighting techniques, mise en scene and the actual content of the show.
The colour grading of the show has been done in such a way to mimic the 80s and again help to evoke a sense of nostalgia for that era. Scenes that take place within Mike's house are dominated by brown and orange colours, creating a warm and homely atmosphere. This conscious decision by the filmmakers helps to create an essence of family and 'togetherness' which is a recurring underlying theme throughout the series. [3] This sense of family and warmth helps to create a safe and comfortable environment, which makes the events of the show even more shocking when their safety is put at risk.

The decoration in their house is very up to date with 80s fashions, suggesting their family is financially stable. This contrasts to the decor in the Byres' household. A lot of their furniture is out dated and suggests their house is still decorated from the 70s. This conveys to the audience this family's lack of wealth and therefore evokes a sense of empathy for the characters (especially as they are the main victims of the monster).

However, soon a different atmosphere is created within the Byres household. Joyce decides to string up christmas lights throughout the house as a method of communicating with Will. Whilst these lights work as a narrative device, they also help to create a sense of wonder and mystery. This helps to continue the sense of mystery throughout the show. The lights are also used to spell out the ominous message 'RUN' - this makes it more threatening as the magical Christmas lights are used to spell out such an ominous, frightening message.

Colour again has a great effect in the government science enclosure. The green and blue colours used within the facility create a very cold, isolated atmosphere which is a direct contrast to Mike's happy, friendly family home. This cold environment created within the facility helps to convey Eleven's isolation. Nobody cares for her, she is simply a test subject - the colours within the scenes in this environment emphasise that.


The directors also put a lot of attention to detail into the props. They recruited Lynda Reiss in order to get the realistic 80s props. They didn't want the props of the show to just have the sense of the 80s, Reiss said "I want it to be the 80s. I don't want it to be what everyone thinks is the 80s". [4]
Some of the realistic 80's props include:
- Pentax MX SLR (Jonathan Byres' camera): the camera was produced in 1976 and was quite a high end product. This makes Jonathan's passion for photography even more evident as it would stretch the budget of the Byres' family.
- Panasonic RX-5090 Boombox and Memorex MRX 1 60-Minute Casette (Will's sound system): it was quite a low end model, making it believable that the Byres family may own one. It helps to suggest their social status as a family.
- Dungeons and Dragons (Mike's game in his basement): the books used in the show are replicas based on one of the show's art directors' real copies. The demogorgon figure is one of the show's only mistakes - it was not actually released until 1984 (a year after the show is set).
As well as the props, the costumes also provide a real sense of 80s authenticity. Corduroy is a common fabric used within the series due to its popularity in the era.
The visual design of Stranger Things really helps to set the time period of the 80s and the themes of the show. The colours and lighting used really help to evoke a sense of 80s nostalgia, whilst also alluding to the themes of mystery, threat and wonder within the show.
The Visual Style - Camerawork and Editing
The camerawork within Stranger Things is visually beautiful. From establishing the scenery to showing the emotions of sheer terror on the children's (and adult's) faces, the camerawork enhances every aspect of the show.
The opening scene of the first episode features a pan down from the dark sky to the Hawkins National Laboratory. This is directly parallel to the opening scene from E.T. This similarity sets the show up to be of the science fiction / fantasy genre.

It is also interesting that the ending shot of the first episode where the kids find Eleven is also parallel with another scene from E.T where they find E.T in the bushes. The use of lighting in this scene, coupled with the camera work, helps to create a sense of mystery. Most of Eleven is left in the shadow, leaving the audience to question who she is, where she came on and what she is doing in the middle of the woods.

Stranger Things includes many more fascinating bits of camera work. The high angle the director's have chosen for this scene helps to put Holly in a vulnerable position as she follow the lights towards the monster. The framing and angle (featuring the lights in the corner of the shot) also allows the audience to see her expression of childlike wonder.

Another high angle shot is used in Stranger Things before Will diapers. This again shows him in a vulnerable position. This camera technique is used many times throughout the series, especially when characters are put in danger by the antagonists.

When Will is using the lights in order to communicate with his mother. Close up shots are used when the word 'RUN' is spelt out. This is to create a sense of enigma, as the audience can not see the entire message until it has been spelt out in its entirety. This keeps with the sense of mystery and threat the series aims to convey.

The editing within Stranger Things is also very creative. Match on action cuts are commonly used, such as when Eleven is walking through the store and has a flashback to the government science facility. This has the effect of showing the audience her mental state and fragility whilst giving more information to us about the Hawkins National Laboratory and what happens in their facility. There are many creative edits featuring Eleven which work to reveal her back story whilst maintaining narrative symmetry.
The editing is often used to create a sense of dread, where the character (mainly Eleven) is reacting to something in front of them (behind the camera and audience). This is a simple convention used within horror / science fiction fantasy films in order to create a sense of tension, mystery and fear.
The Sound Design
Stranger Things features an entirely electronic score. The Duffer Brothers reference Cliff Martinez's work on The Knick and Trent Reznor and Atticus Ross' work for David Fincher as their inspiration for the use of an entirely electronic score. They felt their electronic soundtracks "whilst very modern and cutting edge, also inevitably evoke the sounds of 80s music (most notably Tangerine Dream, Vangelis, and John Carpenter)." [5] The synth music used for the title sequence of Stranger Things sounds very similar to that of John Carpenter's score for Halloween. This immediately sets Stranger Things up to have themes of horror, fear and threat. The Duffer Brothers recruited Michael Stein and Kyle Dixon from the band SURVIVE to compose the musical score for the series. The Duffer Brothers also revealed another reason why they wanted to go down the electronic route; they wanted to play against expectations. They knew their series would be riddled with Spielberg references, so they wanted to take the musical score in a completely different direction from his typical orchestral musical scores in order to differentiate Stranger Things.
The soundtrack often matches up with the action occurring within the scene. The editors and sound designers worked together to match the edits with appropriate sounds for transitions. The 'One Blink for Yes' soundtrack matches up with the flickering lights in Joyce's house. Such attention to detail is what makes The Duffer Brothers' Stranger Things such a success.
As for the diegetic 80s music featured within Stranger Things, the only planned music was The Clash's 'Should I Stay or Should I Go?'. All of the other 80s music was determined by The Duffer Brothers listening to popular 80s music, especially that which would have been played in 1983 and then deciding which sounds created the right tone in the show. The 80s music in the show is frequently used to distinguish Jonathan from Nancy. The music Jonathan can be seen listening to is quite punk, whereas Nancy appears to prefer the popular songs of the time. Much of the diegetic 80s music actually becomes non diegetic (i.e. the music starts playing within the scene, but the actual music is then inserted in post production).
The sound team did use ADR within the series, however, they couldn't use Gaten Matarazzo (who played Dustin) for ADR due to his voice changing so much by the end of production.
Influences and Inspiration - homages
The Duffer Brothers found inspiration from Steven Spielberg, Stephen King, John Carpenter and many more places. Their DNA runs through Stranger Things, whilst its also its own original story.
Inspiration from E.T:
- The shots in the opening and closing scene of the first episode of Stranger Things are directly parallel to a couple of scenes within E.T.
- The bike chase scene in Stranger Things is very similar to that in E.T. Both scenes feature kids on bikes being chased by adults. Because of all the ET references and homages, Stranger Things builds up the expectation that Eleven will make the bikes fly over the government officials, which makes the surprise of flipping the truck have an even greater impact.
- Will spells out 'right here' with the Christmas lights, the same message as the last line in E.T.
Inspiration from Alien:
- The beginning elevator scene in Stranger Things is very similar to that in Aliens (1986) - the sequel the Alien. This aims to evoke the same anxiety and terror featured within the Alien films.
- Will coughing in the hospital bed - similar to the cough in Alien which lead to the alien bursting out his chest.
- Suit design with light on faces worn by the adults in the Upside Down is similar to the space suit design in Alien.
- Monster similar to that in Alien. Cocoons its victims and incubate them with tentacle / slug like things.
Inspiration from Stephen King:
- Joyce hacking away at the wall with the axe is very similar to Jack in The Shining.
- Kids walking on railway tracks - parallel to Stand By Me where kids also walk along railway tracks. Stand By Me is based on Stephen King's The Body.
Inspiration from Nightmare on Elm Street:
- Monster pushing through the wall in Joyce's house - parallel to nightmare on elm street where Freddy pushes through the wall.
- Jonathan, Nancy and Steve capturing and setting the monster on fire is same method used by the teens in Nightmare on Elm Street. False victory - weakened monster but not finished off.
How has this influenced my work?
I have realised colours, lighting and sound design are all an absolutely vital part of production. I have already decided that colour will be a key part of my production, focusing on the colour red in order to show my female as the object of affection. However, I need to also make sure not to neglect the colour grading of the whole product. I will need to get the white balance right and make sure the colours within the setting reflect the mood of the piece. As quite a romantic yet awkward scene, I aim to use both warm and cool colours (the warm colours will represent the romance and the cool colours will represent the awkwardness.)
I will use soft lighting within my production in order to convey my female lead in the most beautiful possible way, this will show why the male is so infatuated with her. I will also be using Christmas lights as props which will help to convey the warm and friendly atmosphere that I'm aiming for.
Due to the awkwardness of the first scene which takes part in Mark's flat, I didn't want to use any non diegetic background music. Instead I will use natural sounds (i.e. birds tweeting) and using this to enhance the silence and awkward atmosphere. In the second scene at Juliet's doorway, I will be using diegetic music in the form of 'silent night' whilst Mark shows his presentation to Juliet. I will need to ensure this music does not over power the dialogue. I will take inspiration from the Duffer Brothers and add the music in post production instead of having it playing during the scene the whole way through like they did in many scenes (such as Will and Jonathan Byres listening to 'Should I Stay or Should I Go' on Jonathan's record player).
[1] The Hollywood Reporter (2016) The Duffer Brothers Talk 'Stranger Things' Influences, 'It' Dreams and Netflix Phase 2 [online] Available at: http://www.hollywoodreporter.com/fien-print/duffer-brothers-talk-stranger-things-916180 [Accessed on: 11/02/2017]
[2] Indie Colour Grading (2016) Stranger Things: Analysing the Colour [online] http://indiecolorgrading.com/stranger-things-color/ [Accessed on: 11/02/2017]
[3] Rob Bessette / Colorist (2016) The Grading Style of 'Stranger Things' [online] Available at: http://robbessette.com/2016/07/29/the-grading-style-of-stranger-things/ [Accessed on: 11/02/2017]
[4] Wired (2016) The Stories Behind Stranger Things' Retro 80s Props [online] Available at: https://www.wired.com/2016/07/stories-behind-stranger-things-retro-80s-props/ [Accessed on: 11/02/2017]
[5] Entertainment Weekly (2016) Stranger Things episode 5: The Duffer Brothers explain the show's soundtrack [online] Available at: http://ew.com/article/2016/07/19/stranger-things-duffer-brothers-episode-5/ [Accessed on: 11/02/2016]
Directors: The Duffer Brothers

From the very first episode of Stranger Things I was hooked. The creators and directors of the successful series, The Duffer Brothers, gained inspiration from almost everywhere. From Spielberg to Stephen King to Star Wars, Stranger Things includes homages to all of these and more.
The Title / Font
The title font used for the title sequence and the titles within the show (e.g. for dates and locations) is a modified version of ITC Benguiat. [1] From the very first title in the very first episode, there is definitely a sense of a Stephen King type of aesthetic. This is due to the font and the colour looking very similar to that of the one used on Stephen King's paperbacks.

This works very well as a narrative tool as it immediately sets up the audience with ideas of what to expect. The font connotes the sense of horror, suspense and supernatural fiction that is present within Stephen King's novels and therefore sets the audience up to expect the same from the show. This was a very simple directorial decision which has proved to be very effective.
Due to the show being a Netflix exclusive, and the convention that people tend to bing watch the shows on Netflix, the title sequence has been kept relatively short so that it can still deliver its desired effect whilst not taking up too much of the viewer's time and therefore frustrating them. Although the title sequence itself is short, everything within the sequence moves slowly and smoothly. This, along with the synth music behind it, helps to build up an ominous atmosphere. A sense of mystery is also created by the title sequence as it begins with close ups of the letters, we do not see the entire title until the end of the sequence. This helps to allude to the mysterious and ominous atmosphere within the show.
The colour of the titles is also significant as it alludes to the perpetual state of danger the characters find themselves in throughout the show. The titles also have a flickering effect, this helps to add to the sense of 80s nostalgia established in the series as it is not too dissimilar to the flicker of images on an old video tape.
The Visual Style - Colour, lighting and mise en scene
Stranger Things was shot on Red Epic Dragon using Zeiss Prime Lenses. [2] A film grain effect is used over the title sequence in order to establish the sense of nostalgia the series aims to evoke, however, this same film grain is not used in the footage in the actual show as this would compromise the 4K resolution of the series. Although, the directors did still want to evoke a sense of nostalgia through the series, they achieved this through lighting techniques, mise en scene and the actual content of the show.
The colour grading of the show has been done in such a way to mimic the 80s and again help to evoke a sense of nostalgia for that era. Scenes that take place within Mike's house are dominated by brown and orange colours, creating a warm and homely atmosphere. This conscious decision by the filmmakers helps to create an essence of family and 'togetherness' which is a recurring underlying theme throughout the series. [3] This sense of family and warmth helps to create a safe and comfortable environment, which makes the events of the show even more shocking when their safety is put at risk.

The decoration in their house is very up to date with 80s fashions, suggesting their family is financially stable. This contrasts to the decor in the Byres' household. A lot of their furniture is out dated and suggests their house is still decorated from the 70s. This conveys to the audience this family's lack of wealth and therefore evokes a sense of empathy for the characters (especially as they are the main victims of the monster).

However, soon a different atmosphere is created within the Byres household. Joyce decides to string up christmas lights throughout the house as a method of communicating with Will. Whilst these lights work as a narrative device, they also help to create a sense of wonder and mystery. This helps to continue the sense of mystery throughout the show. The lights are also used to spell out the ominous message 'RUN' - this makes it more threatening as the magical Christmas lights are used to spell out such an ominous, frightening message.

Colour again has a great effect in the government science enclosure. The green and blue colours used within the facility create a very cold, isolated atmosphere which is a direct contrast to Mike's happy, friendly family home. This cold environment created within the facility helps to convey Eleven's isolation. Nobody cares for her, she is simply a test subject - the colours within the scenes in this environment emphasise that.


The directors also put a lot of attention to detail into the props. They recruited Lynda Reiss in order to get the realistic 80s props. They didn't want the props of the show to just have the sense of the 80s, Reiss said "I want it to be the 80s. I don't want it to be what everyone thinks is the 80s". [4]
Some of the realistic 80's props include:
- Pentax MX SLR (Jonathan Byres' camera): the camera was produced in 1976 and was quite a high end product. This makes Jonathan's passion for photography even more evident as it would stretch the budget of the Byres' family.
- Panasonic RX-5090 Boombox and Memorex MRX 1 60-Minute Casette (Will's sound system): it was quite a low end model, making it believable that the Byres family may own one. It helps to suggest their social status as a family.
- Dungeons and Dragons (Mike's game in his basement): the books used in the show are replicas based on one of the show's art directors' real copies. The demogorgon figure is one of the show's only mistakes - it was not actually released until 1984 (a year after the show is set).
As well as the props, the costumes also provide a real sense of 80s authenticity. Corduroy is a common fabric used within the series due to its popularity in the era.
The visual design of Stranger Things really helps to set the time period of the 80s and the themes of the show. The colours and lighting used really help to evoke a sense of 80s nostalgia, whilst also alluding to the themes of mystery, threat and wonder within the show.
The Visual Style - Camerawork and Editing
The camerawork within Stranger Things is visually beautiful. From establishing the scenery to showing the emotions of sheer terror on the children's (and adult's) faces, the camerawork enhances every aspect of the show.
The opening scene of the first episode features a pan down from the dark sky to the Hawkins National Laboratory. This is directly parallel to the opening scene from E.T. This similarity sets the show up to be of the science fiction / fantasy genre.

It is also interesting that the ending shot of the first episode where the kids find Eleven is also parallel with another scene from E.T where they find E.T in the bushes. The use of lighting in this scene, coupled with the camera work, helps to create a sense of mystery. Most of Eleven is left in the shadow, leaving the audience to question who she is, where she came on and what she is doing in the middle of the woods.

Stranger Things includes many more fascinating bits of camera work. The high angle the director's have chosen for this scene helps to put Holly in a vulnerable position as she follow the lights towards the monster. The framing and angle (featuring the lights in the corner of the shot) also allows the audience to see her expression of childlike wonder.


When Will is using the lights in order to communicate with his mother. Close up shots are used when the word 'RUN' is spelt out. This is to create a sense of enigma, as the audience can not see the entire message until it has been spelt out in its entirety. This keeps with the sense of mystery and threat the series aims to convey.

The editing within Stranger Things is also very creative. Match on action cuts are commonly used, such as when Eleven is walking through the store and has a flashback to the government science facility. This has the effect of showing the audience her mental state and fragility whilst giving more information to us about the Hawkins National Laboratory and what happens in their facility. There are many creative edits featuring Eleven which work to reveal her back story whilst maintaining narrative symmetry.
The editing is often used to create a sense of dread, where the character (mainly Eleven) is reacting to something in front of them (behind the camera and audience). This is a simple convention used within horror / science fiction fantasy films in order to create a sense of tension, mystery and fear.
The Sound Design
Stranger Things features an entirely electronic score. The Duffer Brothers reference Cliff Martinez's work on The Knick and Trent Reznor and Atticus Ross' work for David Fincher as their inspiration for the use of an entirely electronic score. They felt their electronic soundtracks "whilst very modern and cutting edge, also inevitably evoke the sounds of 80s music (most notably Tangerine Dream, Vangelis, and John Carpenter)." [5] The synth music used for the title sequence of Stranger Things sounds very similar to that of John Carpenter's score for Halloween. This immediately sets Stranger Things up to have themes of horror, fear and threat. The Duffer Brothers recruited Michael Stein and Kyle Dixon from the band SURVIVE to compose the musical score for the series. The Duffer Brothers also revealed another reason why they wanted to go down the electronic route; they wanted to play against expectations. They knew their series would be riddled with Spielberg references, so they wanted to take the musical score in a completely different direction from his typical orchestral musical scores in order to differentiate Stranger Things.
The soundtrack often matches up with the action occurring within the scene. The editors and sound designers worked together to match the edits with appropriate sounds for transitions. The 'One Blink for Yes' soundtrack matches up with the flickering lights in Joyce's house. Such attention to detail is what makes The Duffer Brothers' Stranger Things such a success.
As for the diegetic 80s music featured within Stranger Things, the only planned music was The Clash's 'Should I Stay or Should I Go?'. All of the other 80s music was determined by The Duffer Brothers listening to popular 80s music, especially that which would have been played in 1983 and then deciding which sounds created the right tone in the show. The 80s music in the show is frequently used to distinguish Jonathan from Nancy. The music Jonathan can be seen listening to is quite punk, whereas Nancy appears to prefer the popular songs of the time. Much of the diegetic 80s music actually becomes non diegetic (i.e. the music starts playing within the scene, but the actual music is then inserted in post production).
The sound team did use ADR within the series, however, they couldn't use Gaten Matarazzo (who played Dustin) for ADR due to his voice changing so much by the end of production.
Influences and Inspiration - homages
The Duffer Brothers found inspiration from Steven Spielberg, Stephen King, John Carpenter and many more places. Their DNA runs through Stranger Things, whilst its also its own original story.
Inspiration from E.T:
- The shots in the opening and closing scene of the first episode of Stranger Things are directly parallel to a couple of scenes within E.T.
- The bike chase scene in Stranger Things is very similar to that in E.T. Both scenes feature kids on bikes being chased by adults. Because of all the ET references and homages, Stranger Things builds up the expectation that Eleven will make the bikes fly over the government officials, which makes the surprise of flipping the truck have an even greater impact.
- Will spells out 'right here' with the Christmas lights, the same message as the last line in E.T.
Inspiration from Alien:
- The beginning elevator scene in Stranger Things is very similar to that in Aliens (1986) - the sequel the Alien. This aims to evoke the same anxiety and terror featured within the Alien films.
- Will coughing in the hospital bed - similar to the cough in Alien which lead to the alien bursting out his chest.
- Suit design with light on faces worn by the adults in the Upside Down is similar to the space suit design in Alien.
- Monster similar to that in Alien. Cocoons its victims and incubate them with tentacle / slug like things.
- Joyce hacking away at the wall with the axe is very similar to Jack in The Shining.
- Kids walking on railway tracks - parallel to Stand By Me where kids also walk along railway tracks. Stand By Me is based on Stephen King's The Body.
Inspiration from Nightmare on Elm Street:
- Monster pushing through the wall in Joyce's house - parallel to nightmare on elm street where Freddy pushes through the wall.
- Jonathan, Nancy and Steve capturing and setting the monster on fire is same method used by the teens in Nightmare on Elm Street. False victory - weakened monster but not finished off.
How has this influenced my work?
I have realised colours, lighting and sound design are all an absolutely vital part of production. I have already decided that colour will be a key part of my production, focusing on the colour red in order to show my female as the object of affection. However, I need to also make sure not to neglect the colour grading of the whole product. I will need to get the white balance right and make sure the colours within the setting reflect the mood of the piece. As quite a romantic yet awkward scene, I aim to use both warm and cool colours (the warm colours will represent the romance and the cool colours will represent the awkwardness.)
I will use soft lighting within my production in order to convey my female lead in the most beautiful possible way, this will show why the male is so infatuated with her. I will also be using Christmas lights as props which will help to convey the warm and friendly atmosphere that I'm aiming for.
Due to the awkwardness of the first scene which takes part in Mark's flat, I didn't want to use any non diegetic background music. Instead I will use natural sounds (i.e. birds tweeting) and using this to enhance the silence and awkward atmosphere. In the second scene at Juliet's doorway, I will be using diegetic music in the form of 'silent night' whilst Mark shows his presentation to Juliet. I will need to ensure this music does not over power the dialogue. I will take inspiration from the Duffer Brothers and add the music in post production instead of having it playing during the scene the whole way through like they did in many scenes (such as Will and Jonathan Byres listening to 'Should I Stay or Should I Go' on Jonathan's record player).
[1] The Hollywood Reporter (2016) The Duffer Brothers Talk 'Stranger Things' Influences, 'It' Dreams and Netflix Phase 2 [online] Available at: http://www.hollywoodreporter.com/fien-print/duffer-brothers-talk-stranger-things-916180 [Accessed on: 11/02/2017]
[2] Indie Colour Grading (2016) Stranger Things: Analysing the Colour [online] http://indiecolorgrading.com/stranger-things-color/ [Accessed on: 11/02/2017]
[3] Rob Bessette / Colorist (2016) The Grading Style of 'Stranger Things' [online] Available at: http://robbessette.com/2016/07/29/the-grading-style-of-stranger-things/ [Accessed on: 11/02/2017]
[4] Wired (2016) The Stories Behind Stranger Things' Retro 80s Props [online] Available at: https://www.wired.com/2016/07/stories-behind-stranger-things-retro-80s-props/ [Accessed on: 11/02/2017]
[5] Entertainment Weekly (2016) Stranger Things episode 5: The Duffer Brothers explain the show's soundtrack [online] Available at: http://ew.com/article/2016/07/19/stranger-things-duffer-brothers-episode-5/ [Accessed on: 11/02/2016]
DIRECTIONS UNIT: Directorial Developments
!st directorial development / change
After storyboarding my shoot, I decided to change one of my directorial decisions. I decided against using mainly wide shots as I wanted to use wide shots after the wedding video order to heighten the awkward, uncomfortable tension. Therefore the shots before the wedding video would need to be closer up / shot-reverse-shots in order to contrast to these wider shots.
2nd directorial development / change
I also decided to change my ideas for the sound design. Originally I wanted the wedding video to be mainly ambient / background sounds rather than using a soundtrack. However I decided against this and opted to use background music. This was just to enhance the romantic atmosphere and emphasise the love within the footage.
3rd directorial development / change
I decided to make the red colour within my scene even more subtle to prevent the connotations becoming mixed. If there was too much red within the scene, feelings of danger or feelings of stronger love than I wanted. Therefore I decided to make this colour very subtle and just use splashes of it within my product.
After storyboarding my shoot, I decided to change one of my directorial decisions. I decided against using mainly wide shots as I wanted to use wide shots after the wedding video order to heighten the awkward, uncomfortable tension. Therefore the shots before the wedding video would need to be closer up / shot-reverse-shots in order to contrast to these wider shots.
2nd directorial development / change
I also decided to change my ideas for the sound design. Originally I wanted the wedding video to be mainly ambient / background sounds rather than using a soundtrack. However I decided against this and opted to use background music. This was just to enhance the romantic atmosphere and emphasise the love within the footage.
3rd directorial development / change
I decided to make the red colour within my scene even more subtle to prevent the connotations becoming mixed. If there was too much red within the scene, feelings of danger or feelings of stronger love than I wanted. Therefore I decided to make this colour very subtle and just use splashes of it within my product.
DIRECTIONS UNIT: (Research) The Importance of Colour
Due to my idea of focusing on colour as one of my key directorial stylistic approaches, I decided to do a bit of research into how colour affects film.
Colour helps to tell a story. It can evoke emotional, psychological and even physical feelings without the audience even being aware that this is happening [1]. Colour can:
- elicit psychological reactions
- draw focus to details
- set the tone and mood
- represent the characters and their personalities
- shows changes / story arcs
Colours can be altered in a variety of ways. The hue, saturation and value can all be altered in order to produce a specific look. The more vibrant the colour, generally the more happy and exciting the scene. In contrast, if the colours used are more dull, then the scene is often trying to portray a melancholy atmosphere. However, this is just stereotypically, many films break these codes and conventions in order contrast moods and emotions.

As I wanted to use red as the main colour in my production, I needed to be clear what emotions it might evoke and what mood and tone it sets. I need to be careful with my use of red because (as well as conveying love and romance) it can convey feelings of danger and anger. I will therefore lighten the value of the red in order to make it slightly more pink in tone. Pink often connotes innocence, sweetness, femininity and beauty. These are all character traits that are associated with my character Juliet. Therefore by making the red have a slightly pink hue, it will help to create the correct tone of love as well as innocence and beauty.

During my research I also discovered how balancing colours affects the overall look of the product. This thought had never occurred to me before, I didn't realise that the balance of the colours could make such a difference to the overall outcome. When films often use different variations of the same colour, this creates a monochromatic look. This monochromatic colour scheme helps to create a harmonious, soft feeling. This is the sort of look that Wes Anderson's films portray. I had originally wanted to take inspiration from Wes Anderson and create a visually striking product that focused a lot on colour. However, after analysing some of his films, I still couldn't figure out how exactly he managed to achieve that unique look to his films. Now that I have conducted research into colour, I can see that I was missing how he balanced the colours within his productions - this is a major aspect of what gives his films such a unique look.
I would go for a monochromatic look for my product, however I feel that using too much red would start to convey the wrong mood and atmosphere. I wanted the romance to be subtle to represent Mark's underlying love for Juliet. I will therefore stick with just adding splashes of colour, however in future I would love to experiment with filming in a monochromatic colour palette.

Colour helps to tell a story. It can evoke emotional, psychological and even physical feelings without the audience even being aware that this is happening [1]. Colour can:
- elicit psychological reactions
- draw focus to details
- set the tone and mood
- represent the characters and their personalities
- shows changes / story arcs
Colours can be altered in a variety of ways. The hue, saturation and value can all be altered in order to produce a specific look. The more vibrant the colour, generally the more happy and exciting the scene. In contrast, if the colours used are more dull, then the scene is often trying to portray a melancholy atmosphere. However, this is just stereotypically, many films break these codes and conventions in order contrast moods and emotions.

As I wanted to use red as the main colour in my production, I needed to be clear what emotions it might evoke and what mood and tone it sets. I need to be careful with my use of red because (as well as conveying love and romance) it can convey feelings of danger and anger. I will therefore lighten the value of the red in order to make it slightly more pink in tone. Pink often connotes innocence, sweetness, femininity and beauty. These are all character traits that are associated with my character Juliet. Therefore by making the red have a slightly pink hue, it will help to create the correct tone of love as well as innocence and beauty.
I would go for a monochromatic look for my product, however I feel that using too much red would start to convey the wrong mood and atmosphere. I wanted the romance to be subtle to represent Mark's underlying love for Juliet. I will therefore stick with just adding splashes of colour, however in future I would love to experiment with filming in a monochromatic colour palette.

[1] INC, S. (2016) How to use color in film: 50+ examples of movie color Palettes. Available at: https://www.studiobinder.com/blog/how-to-use-color-in-film-50-examples-of-movie-color-palettes/ (Accessed: 11 February 2017).
Subscribe to:
Posts (Atom)