Pre Production
From the early stages of the project, we knew we wanted to do a comedy as a group with Alex as the writer / director, myself as the director of photography and Melissa as the editor.
We quickly settled on the idea of doing a mockumentary as Alex was keen to write this and myself and Melissa had no objections. Initially, we were aiming to do the mockumentary in the style of Cunk on Britain, however, this was too difficult to write without completely imitating the original source material. Following this, we then decided to take The Supervet as inspiration and turn this into a mockumentary rather than a serious documentary.
I looked into The Supervet in order to familiarise myself with the source material and see how this was shot. My research into The Supervet mainly focused on how the camera, lighting, colours and mise en scene are used to establish the medical / clinical theme of the documentary. I found they did this through using cool colour tones and harsh lighting - I used this for inspiration into how to dress the set, light the scene and colour the scene. I decided against using the filming style of The Supervet as this felt too serious (as it does fall into the documentary genre). I also felt that using this filming style would cause the viewer to miss some of the key comical bits in our script, therefore I decided to shoot Vet-Man in a similar style to Come Fly With Me.
Come Fly With Me is filmed in a very similar way to the drama genre yet it is classed as a mockumentary. As the mockumentary heavily features interviews / characters taking to the camera, it makes more sense to shoot the entire programme through these lower angled shots (instead of filming the scenes through high angle, fly on the wall style shots). Come Fly With Me imitates the typical sequences and actuality seen in documentaries as characters are seen walking through the airport / performing their job roles as well as being interviewed. Using lower angled shots allows the audience to see the facial expressions and the reactions of the characters which is where a lot of the comedy within Come Fly With Me lies - as the script for Vet-Man also displayed that a lot of the comedy was to be shown through the expressions and reactions of the characters, I opted to film Vet-Man in a similar manner.
As well as researching programmes in the documentary / mockumentary genre, I also looked into my role as director of photography, camera settings, light movement and colour theory. This research gave me a lot to think about with the test shoot.
I used the test shoot to experiment with the camera settings in order to find out which kit and which settings gave the best look. I found that DSLRs worked best if we were going to go for handheld shots as they were easy to move in steady motions. I experimented with lighting for the interview sections and surgery section as well in order to work out the visuals for these scenes. The test shoot was very useful as I found that in the footage filmed, I used a too high ISO which meant the footage was grainy and poor quality. This meant I could prevent this being an issue in the actual shoot. This lead me to create a standard set of camera settings to use in the shoot: ISO200, shutter speed 1/30 and aperture f/5.0 - I then manipulated the settings from here to slightly adjust the look of the shot, however, most of the footage was kept to these settings. I also discovered the best way to light the interviews was with two soft box lights as this created an even light across the interview subject's face. I also discovered that the best way to light the surgery scene was to use a small LED light from above on a high setting and a small LED light from below on a low setting to create a harsh light to emulate that of the lights used in an operating theatre.
As well as working out the camera and lighting settings, following this test shoot I was able to make a shot list as I was able to figure out what sort of shots would be needed to convey the narrative.
As well as preparing my work as director of photography, I had to do my part as producer (as we all decided to share the role). As director of photography, it made most sense for me to find the locations as these would be vital to the visual look of the film. I performed location recces which enabled me to see what sort of lighting I would need and also helped to inform Alex's order of the shoot day as we needed to film certain scenes when the sun was in certain places. We also worked together to find the cast and props for the shoot.
Production
Once all the pre production material was ready and the test shoots had been performed, we could shoot the piece.
Due to testing the equipment and settings in the test shoot, I knew exactly how I wanted to shoot the mockumentary which made the shoot run quite smoothly. However, towards the end of the day, we did begin to run out of time meaning that some of the shots we had planned to film were more rushed than we intended and some vital shots were missed (e.g. the blood splatter in the surgery scene).
As director of photography, I was in charge of the visual look of the shoot - I controlled the camera settings and the lighting and helped the director to dress the set to help the visual identity of the project.
Post Production
As well as being in charge of the visual look whilst shooting the footage, it was also my role to aid the colour correction / colour grading process. I sat with Melissa and told her how to alter the colours in order to give the project the desired medical / clinical look.
Strengths
- Performing research into the documentary / mockumentary genre meant that I knew exactly what I wanted to test in the test shoots - I tested the framing for the interviews using the style of framing seen in The Supervet and Come Fly With Me. Looking into existing programmes highlighted what shots are generally used within this genre of filmmaking and how I could use these in our project. Interview subjects are generally sat to one side of the frame facing the opposite side (as per the rule of thirds) - I made sure to do this in our project. The research into these programmes also helped to display that colour often reflects the subject matter of the documentary, therefore I emulated this in our project.
- Doing the test shoot meant that I found the best piece of kit for the project and was able to figure out the best settings to use and how I wanted to set up the lights prior to the shoot. Through doing the test shoot I found that DSLRs worked best as they enabled easier and steadier movement for scenes such as "Sheila" and Coco playing in the park. I also found the best settings to use were a low ISO, slow shutter speed and wide aperture. The test shoot turned out grainy and poor quality as I used an ISO that was too high - I was able to rectify this in time for our shoot so that our actual footage was not grainy. Testing the dramatic lighting for the surgery scene was also a strength of the project as I feel this scene turned out very well because of it. We were beginning to run out of time in the location, but as I knew exactly how I wanted to set up the lights I was still able to get the desired visual look for this scene.
- As well as good lighting for this scene, I think the colour grading turned out well (as well as being turning out well throughout the project). I worked with Melissa to manipulate the colour of this scene to be cooler in tone in order to reflect the medical / clinical theme of the surgery scene. To enhance the lighting in the scene, I also increased the exposure so that the lighting looked even more clinical. This works well in contrast to the warm toned scenes outside of the consultation room / surgery. The colour grading through the rest of the project helps to give it a naturally lit look which is common in the documentary genre as cinematographers in this genre are primarily concerned with capturing reality and therefore the colours of the footage should match this.
- One of the biggest worries for us was to find a believable location - somewhere that looked believable as a vet's consultation room and operating theatre. Fortunately, we were able to find quite a plain location which we were able to dress in order to transform it into the desired set - the props (such as the posters) really helped allude to the idea that this location was a veterinarian practice.
Weaknesses
- As it is a very common convention of the documentary genre (and is seen in one of our inspirations; The Supervet) it would have been good to get a few fly on the wall style shots. These would have been good in the waiting room scenes as it would have seemed more like the actuality footage seen in the documentary genre and would therefore have looked more like reality.
- As I decided to go on the tripod instead of handheld for the surgery scene, I missed the blood splatter on the vet's face. This was an important shot which we ended up having to cut around and use other shots to compensate for this. In future, I will have confidence in my abilities and go hand held to ensure the important action is not missed.
- Part of the reason that I missed the blood splatter was that we were running out of time and needed to pick up the pace. Rushing meant that I made the poor decision of leaving the camera on the tripod for this scene and therefore missed the blood splatter. Other shots also felt rushed meaning that the quality of the shots was not as high as I had originally intended. In future, we need to better schedule our time and stick to it to ensure we don't have to rush scenes.
- Whilst DSLRs seemed to be the best option in terms of filming moving shots steadily and easily, they did not provide the best quality images. In future, I would like to use the Panasonic cameras in order to improve the visual quality of the product. In future shoots I will test out equipment that will help to film steady handheld footage with the Panasonic so that we can use this kit - instead of opting for a piece of kit which is easy to use for handheld but doesn't provide the best quality images.
What did I learn?
- Colour is important for emotion / theme - it can change the mood of the shot completely. The surgery scene before colour grading look dull and boring and it was not clear that the vet was in an operating theatre. By brightening the shot and adding a cool blue hue, the medical theme was established.
- Exposure important for quality - the test shoot footage was poor quality and grainy due to using a too high ISO. The footage in our shoot was better as I rectified this by using a lower ISO and then compensated for the low exposure by using a slower shutter speed (1/30) and a wider aperture (f/5.0)
- Lighting is important for both the quality of the shot and the mood created. I used soft box lights to create even lighting in order to create a clear, bright image in the consultation room - this shows how light can be used for the quality of an image. I then used two smaller LED panels to light the surgery scene in a dramatic way to establish the clinical theme - this shows how light can be used to create mood.
- Working with animals can be difficult but went a lot more smoothly than anticipated. Regular breaks need to be taken to ensure the animal doesn't become stressed. The animal should also be trained (and ideally their trainer be present) so that they follow commands so that the shoot runs smoothly.
- Sound is also important to the overall quality - we should have used different sound equipment in order to improve the sound quality instead of the rode microphones as this lead to a lot of background noise.
What could I develop?
- I could develop my time management skills as this would prevent scenes becoming rushed and making poor choices which results in vital shots being missed. In future I should make a stringent schedule which should be determined by how long shots took to film in the test shoot. In the test shoot I focused on the equipment / settings I would be using in order to create the visual look of the project, however, I didn't note how long everything took to test which would have been a good idea.
- In future I should experiment further with kit choices so that we end up with the best equipment to capture the best quality footage. I would like to use the Panasonics in future so that the image quality is the best it can be - I will need to test accompanying equipment / accessories to make the panasonic easier to use for handheld shots if we opt to do a similar project for our final major project.

Tuesday, 15 May 2018
TRANSITION UNIT: Director of Photography Statement
As director of photography, I was in charge of the look of the project.
The first thing I did was research the source material we had chosen as well as my responsibilities as director of photography, camera settings and colour theory.
Through this research I found that shooting documentaries / mockumentaries differs greatly depending on what the aim of the piece is and how this is delivered - i.e. if the piece relies greatly on the facial expressions and reactions of the subjects, lower angles are more ideal. However, if you want a typical fly on the wall observational style, higher angles are the best option. I discovered through the research that our piece would be best shot using the subject matter and colour tones of The Supervet but using the filming / framing style of Come Fly With Me as inspiration.
The colour tones in The Supervet have a cool blue toned hue in order to reflect the medical / clinical nature of the programme. The lighting in the interview scene is also artificial and quite harsh which again adds to the clinical subject matter. The setting of the interviews is again very clinical looking - the mise en scene all connotes that the subject matter of the programme is medical. In order to replicate this look in our production, we knew we had to dress the set appropriately to make it believable as a vet's practice (we used posters and surgical equipment to dress the set) - I also manipulated the lighting, camera settings and colour in order to add to this look.
Although a mockumentary in genre, the filming style of Come Fly With Me possesses many of the drama genre conventions. There are no fly on the wall scenes, it is all filmed low angle - this is due to a lot of the comedy being portrayed through the characters and their facial expressions. To keep in line with the documentary genre, sequences are filmed of the characters walking through the airport / working at their jobs - this helps the filming style of the mockumentary look like a serious documentary which adds to the humour when the events in the airport / interviews with the staff are comical instead of serious.
This then influenced how I shot our piece - Vet-Man. Like Come Fly With Me, I filmed Vet-Man in a similar way to how dramas are filmed. This allowed me to be at the same height as the actors, rather than attempting to film the mockumentary in a fly on the wall style. If I had opted for this style, a lot of the humour may have been lost as it would not have been visible to the camera.
I performed a test shoot in order to figure out the best settings and lighting to use. From this, I decided to film all the scenes within the consultation room / surgery with artificial lighting in order to create the clinical look seen in The Supervet. The artificial lighting was integral to the surgery scene as I created a very dramatic look to exaggerate the clinical surroundings. I then decided to contrast this with naturally lit warmer interviews and scenes in areas such as the waiting room, Sheila's house and the park to contrast with the clinical setting of the consultation / surgery. From the test shoot, I figured out the best settings to use were ISO 200, shutter speed 1/30 and aperture f/5.0 as this allowed for good quality, non grainy footage that was exposed correctly - this worked well in the shoot as it allowed for good quality, well lit footage which could then be manipulated in post production. I ensured to follow the rule of thirds with the interviews in order to keep in line with the documentary genre conventions, I also filmed sequences (like the surgery scene) which is also similar to the documentary genre - this then allowed for the comedy to show through the events that unfolded.
As well as being in control of the camera settings and lighting in order to create the visual look of the film, I aided Melissa with the colour grading - this was to ensure that my vision was carried through the editing process and that the footage I filmed was realised in the way it was intended. Firstly, we ensured all the colours matched as two different cameras were used so there were slight variations between the shots. Once all the colour matched and flowed through, we began to grade the scenes. The naturally lit scenes (the waiting room, Sheila's house, the park and the area the bin) were brightened slightly and given a warmer tone. This helped to contrast to the surgery / consultation scenes which were given a cooler tone - this contrast helped to enhance the clinical / medical theme of the mockumentary.
As director of photography, I aimed to emulate the documentary genre in terms of the interviews and sequences used by using conventions from this genre. I aimed dress, light and colour the scenes to reflect the subject matter and allow the comedy be conveyed through Alex's script. I think I was successful in my cinematography as the visual style looks natural (as is a convention in the documentary genre), yet the grading helps to connote the medical theme.
TRANSITION UNIT: The Edit
As the editor for the group, Melissa was in charge of piecing together the material.
She used the script and the shot list to piece together the footage.
Rough cut 1:
Rough cut 2:
Once Melissa had got the edit to the fine cut stage, I sat with her (as director of photography) to do the colour grading. We wanted to make the scenes within the consultation room and the operating theatre cool toned to enhance the clinical qualities of the setting and to reinforce the medical theme. We wanted to contrast this with warm tones in the waiting room area and in Sheila's home. We also had to ensure all the shots matched within the scenes as two different cameras were used so two different images were produced.
I used my research on colour theory to inform the decisions into the colour grading.


 Unfortunately since we shot on DSLRs, there wasn't a lot of room to manipulate the footage without affecting the quality of the film.
Once the colour correction was complete and the audio was rectified, we had our final cut.
Final cut:
She used the script and the shot list to piece together the footage.
Rough cut 1:
Rough cut 2:
Rough cut 3 / Fine cut:
I used my research on colour theory to inform the decisions into the colour grading.


Once the colour correction was complete and the audio was rectified, we had our final cut.
Final cut:
Monday, 14 May 2018
TRANSITION UNIT: Website
To provide a platform for our project, we made a website.
On this website you can find:
- The film
- Details about producing the film
- The crew involved and their statements

On this website you can find:
- The film
- Details about producing the film
- The crew involved and their statements

https://ahargood.wixsite.com/vet-man
TRANSITION UNIT: Fine cut
Today we showed Simon our latest cut.
Simon's feedback:
- Doesn't feel like a fly-on-the-wall / observational documentary as there are no high angle cameras. We didn't film any shots from this angle as we were limited for time in our location for the vet's practice and these shots would have taken a larger amount of time to set up. Unfortunately, this means that our piece doesn't fit the conventions of the documentary / mockumentary genre and therefore loses this quality. Instead, our piece feels more like a drama / comedy with the closer camera angles.
- The music for the title sequence works well and it would be nice to continue it through the piece a little more to lift the mood and hint at the mockumentary genre. The music is appropriate to the documentary genre and feels similar in tone to that of The Supervet and 24 Hours in A&E.
- No colour grading has been done yet, this will help to establish the clinical theme of the mockumentary.
- The interview sections work really well as these follow the conventions in the documentary / mockumentary. The wide and medium close up shots work well and aid the narrative.
- the audio of the piece still needs to be sorted out - still peaking in places and there is still some background noise.
- In the consultation scene, potentially add more shots as the scene is quite lengthy (although, this could be difficult if we don't have this coverage).
Sunday, 6 May 2018
TRANSITION UNIT: Shoot Days 1 & 2
Shoot days 1 and 2
Shoot day 1
For the first day of the shoot we had booked the location for all the vet practice scenes – we had planned to get everything shot in one day, however, this was not possible in the end. Instead we decided to priorities the scenes which required the village association location as we only had this booked for the one day so we had to ensure all of these scenes got filmed.
As director, Alex planned the order of the day. As director of photography, I then used my shot list to work through the scenes with Alex directing. The order of the day changed slightly from the schedule as we realised the order of filming could be better in order to make the shoot more time efficient.
Alex’s order of the day:

Before we began setting up the equipment, we needed to dress the set. This involved moving all the tables and chairs in the meeting room to the side and taking the existing posters off the noticeboards and walls in order to put up our own vet’s posters to make a convincing consultation room. We took a few of the chairs and moved them into the foyer to act as the waiting room chairs. We also took a few of our posters and stuck them to the pillars in the foyer to accurately resemble a vet’s waiting room.

Once the chairs and the tables were out of the way, we pushed a smaller table against the wall and put an office chair behind it. This would act as the vet’s consultation room. We then added posters to the walls and props to the table (paperwork, laptop and some small cow figurines – this was to add to the cow humour present in the script).

Once the set was dressed, I set up lighting and camera equipment. As we were beginning with the consultation room scene, I set up the lights and cameras to be suitable for this environment. So that we could get a natural yet clinical look, we drew the blinds slightly to allow a small amount of natural light in. I then set up the two soft box lights to make the scene brighter and more clinical looking – these lights would also provide a clean, even light across the vet’s and Sheila’s face.
I then set the cameras up to match. As the cameras are slightly different models, it was difficult to match them exactly using the same settings. Therefore, I created a standard set of settings and then fiddled with them slightly until the images on the cameras matched the best they could.
The cameras used were:
Canon 700d with 18-55mm lens
Canon 60d with 18-55 mm lens
The microphones we used were:
2 x Rode directional microphones
The lighting we used was:
2x Interfit Soft box lights
2x smaller LED lights (for the operating theatre scene)
My standard filming settings were:
ISO – 200
Shutter Speed – 1/30
Aperture – f/5.0
I used these settings for the consultation room scenes and the waiting room scenes.
Scene 5 (the consultation room scene between the vet, Sheila and Coco) was the first scene we filmed. This took longer than expected as there were multiple different camera angles I needed to capture for the narrative. My shot list did make this slightly easier, however, the angles were slightly more complex than anticipated.
The over the shoulder shot was the first shot I set up. I had to ensure that the laptop screen (filled with images of cows) was visible as well as the vet’s shoulder. The only problem with obtaining this angle was that I would have ideally liked to be closer to the subject, but this would mean that this camera would then be in shot of the camera capturing the wide shot. The wide shot was positioned in a similar place to the other shot, however, this shot was to capture the wider action such as the vet slamming the laptop closed as well as Sheila and Coco entering the room.
These cameras were used in these angles for a few takes to ensure the lines were delivered in the intended manner and that the action was captured. I then moved the cameras so that one camera was aimed at the vet as a medium close up and the other was aimed at Sheila as a medium close up. Whilst this camera was aimed at Sheila, we also obtained all the reaction shots she would make during the scene. The vet’s medium close up was then moved to be a wide shot of him looking over Coco. This combination of various camera angles meant that this scene took a fair amount of time to film, but I believe we got a good amount of coverage making it worth it.
Following this, we filmed scene 6 (the vet’s interview in the consultation room) as the room was already set up for this scene. This was a very simple scene to film. I set up the Canon 700d as a wide shot and the Canon 60d as a medium close up shot – I used my standard set of settings to ensure for clear quality, well-lit footage. I ensured to adjust the white balance to ensure an image that was true to colour, however, it is likely the colour of this scene will be manipulated in the edit to enhance the clinical qualities of the location. I will work with Melissa on the colour grading so that we get the desired look.
After the initial consultation room scenes were filmed, we filmed the waiting room scene. I didn't want to use artificial lighting for this scene as I wanted it to have a warm and natural look. We planned to film this in early afternoon, therefore the sun would be beginning to come in from the west and therefore come through the large windows. The sun came through the windows as planned and enabled us to capture a bright, warm scene. I was able to use the same standard set of settings as the natural light was just as bright as the artificial lighting in the consultation room. For this scene we just had to film Sheila and coco entering the waiting room, sitting down with Coco and waiting to be called in. We only had to do a few takes of this as this was a straight forward scene with no dialogue. I framed and focused the shot with Sheila and Coco in and then Alex directed them to walk out of the surgery and back into the shot and sit down. After a couple of takes of this, I filmed some medium close ups of both Sheila and Coco.
Along with this scene, we also filmed scene 1 - the exterior shot of Sheila and Coco walking into the surgery. This was another straight forward scene as it just required Sheila and Coco to walk into the building with no dialogue. I adjusted the settings from my standard ones to ISO200, aperture f/20 and a shutter speed of 1/60. Using an aperture of f/20 meant that more of the shot was in sharp detail and that the shot also didn't become over exposed. We shot this in the early afternoon so that the sun was no longer directly overhead and casting odd shadows, instead the lighting was just right.
Following this, we filmed scene 8 - the surgery scene. This involved rearranging the meeting room again. We used a plain corner of the room and set up a surgery table and surgical equipment. Aidan got changed into his scrubs in order to make him believable as a vet. I altered the lighting as per my shot list so that the scene was dramatically lit. This involved setting up the two smaller LED lights and putting one on a high setting from above and one on a lower setting from below. The one at a high setting from above meant there was a concentrated light source shining down on Aidan and creating the dramatic shadows we required. I tested this in the test shoot so was able to replicate the look we intended to capture. I did not need to alter my camera settings from my standard set as the change in lighting meant that the scene was already darker and had the desired look. I white balanced both the cameras which resulted in quite a warm tone - I will sit with Melissa in the editing process to colour grade this scene to have a cooler tone in order to reflect the clinical nature of this scene. Filming this scene was very tricky as there was a lot to capture and we were beginning to run out of time in the location. As some shots required Aidan to be covered in blood and some didn't, we had to ensure to shoot the footage where he was not covered in blood first. I used the shoulder mount and went handheld to film the cutaway shots of Aidan putting on the gloves, the mask and looking at the laptop screen. I had originally intended to film the blood splatters handheld, however, I was anxious that I would miss these shots so opted to go on the tripod instead. However, this actually ended up meaning that I did miss these shots as the movements panned out different from when we blocked them before shooting. I filmed one medium shot of the vet going in to inject Coco first and then filmed the close up blood splatters. I then went back to the medium shot to film the second time of the vet going in to inject Coco. This meant that Alex could get closer with the water gun (filled with non-toxic fake blood) to shoot Aidan with the blood - this meant there was less risk of getting the fake blood on the walls of the location (however, we were prepared for if this happened. We had wipes and covered the surrounding floor with newspaper). I feel this could have been filmed better but due to running out of time in the location, we didn't have a lot of options. To compensate for missing some of the blood splatters, I filmed some shots of blood on the surgical equipment etc. which can be used to bridge the gaps where I missed the vital shots.
After the surgery scene, we filmed scene 10 and 12 - the post-surgery interview scenes. This, like the 2 camera consultation room interview, was very straight forward to film. This just involved setting up the two cameras on a wide and a medium close up shot and allowing the vet to speak. I did not need to alter my setting from my standard set but I did need to reintroduce the two soft box lights to light the scene. As with the surgery scene, I white balanced the scene and ended up with a warm tone - this will be corrected in post production to give a cooler, clinical look.
Following this, we filmed scene 7 and scene 9 - the post surgery waiting room scenes. This involved filming Sheila in the waiting room without Coco. As we wanted this scene to look different in terms of lighting to the earlier waiting room scene, we opted to film these as the penultimate scenes of the day. This meant the sun was lower in the west and therefore the light coming through the windows was warmer and leaving longer shadows. As well as just filming Sheila waiting (which comprised of filming wide and medium close ups of Sheila sitting there, and close up shots of Sheila fiddling her hands nervously). I kept to my standard set of settings as the natural light coming through, combined with these settings, gave us the desired look. As well as filming Sheila waiting, we also filmed the vet coming out to tell Sheila the bad news. This involved setting up a wide shot to show the vet entering the room and approaching Sheila. I then got close up shots of Sheila's reaction and the blood covered leaflet.

The final scene we shot on day 1 of the shoot was the outside scene where Sheila walks past as the vet is dumping the body. I used the shoulder mount of these shots so that I could follow the movement within the scene (although there wasn't a great deal of movement to follow). I adjusted my settings to allow less light into the sensor as using my standard set of settings meant the shot looked over exposed. I changed the aperture to f/18 and this resolved the exposure of the scene. I started by filming the vet approaching the bin and seeing Sheila walk behind. After this I filmed a medium close up of Sheila's reaction. Then the final shot I filmed was the vet approaching the bin from the opposite side.
That was a wrap for the day. All we needed to film on day 2 was Sheila's interview and the idyllic shots of her and Coco playing.
Shoot day 2
Dressing the set for day 2 of the shoot was very simple as we just needed to make the set believable as Sheila's house. As the location was my house, we were able to move things around and manipulate the scene to have the desired look. We added the photo frame of Coco and a wedding picture to act as Sheila and Kevin.
We started by filmed scene 4 - Sheila's interview. This was very straight forward as it just involved setting up the two cameras on a wide and a medium close up and Sheila running through her dialogue. I opted to use natural light for this scene as we wanted to create a warm, welcoming atmosphere to reflect the home environment. I adjusted my settings slightly from my standard set as I used a shutter speed of 1/40 instead of 1/30. I then white balanced the scene which gave the warm feel we desired. As well as filming the interview, I filmed the cutaway shots of the photo frames and Coco.
After this, we filmed scene 3 - Sheila and Coco playing in the park. I had to adjust my settings from my standard set again - for this shoot I used an ISO of 200, shutter speed of 1/25 and an aperture of f/18. This gave the ideal look for this scene. The white balance gave the scene a warm look which aided the idyllic qualities of the shot. To film this scene, Alex directed Sheila and Coco to play fetch and to walk through different areas of the park. I filmed a variety of shots to give us plenty of coverage for this sequence.
Shoot day 2 went very smoothly with very little errors. I will sit with Melissa to colour grade the footage we shot so that I can ensure our film has the desired look.
What worked?
- Our set dressing, props and costume meant that the location and cast were believable as a vet’s practice and vet staff. The consultation room had noticeboards available so that we could pin up vet’s posters in order to make the location believable.
- The natural lighting in the waiting room and Sheila’s home allowed for the warm, natural, welcoming look we were aiming for. This reflects the type of shots seen in the documentary programmes we are mocking.
- There was much less grain on the footage from when we performed the test shoot. I was able to rectify this grain by using a lower ISO, a wider aperture and a slower shutter speed. This improved the visual quality of our piece.
- The DSLR worked very well for the outdoor scenes with Sheila and Coco playing fetch. We unfortunately did not have the shoulder mount we used in the test shoot available to us, instead, we use a monopod to allow for footage that would be more stable than purely going handheld.
- Whilst working with Coco was a challenge, it still worked. We had treats and water to keep her happy, as well as taking her out for regular breaks around the field that backed onto the location.
What didn’t?
- The poor acoustics of the meeting room meant that the sound echoed slightly and therefore wasn’t as clean and crisp as we wanted it to be. I will feed this back to Melissa so that she can attempt to resolve this issue in the edit.
- We should have booked the location for two days instead of just one. The consultation room scene took longer than expected to film meaning that the surgery scene, post-surgery interview scene and final waiting room scene were quite rushed and therefore not realised to their full potential.
- Due to lack of time, I didn’t fully block through the surgery scene with Alex, this meant some vital shots were missed / not captured to their best potential. I was afraid of missing the blood splatters if I went handheld, so I decided to shoot this on the tripod. However, this ended up being the wrong decision as using this method meant that I did actually miss the blood splatter. I should have shot this handheld so that I could follow the vet’s movements, in future I should have confidence in my abilities to ensure the best footage is captured. We should be able to work around this in the edit as I did manage to capture some blood splatters and other cutaways which could be used to cover the shots I missed.
- We also had to ensure to be extremely careful with the blood splatter as this location was very strict on not getting anything on the walls. Our previous location (before we found out we could not film with animals there) would have been better for this scene as we would have been able to set this scene further away from a wall and therefore would not have to be so exact with the blood splatters (we would still have needed to be careful to ensure we didn’t damage / stain their premises but the splatter wouldn’t have needed to be as exact as it needed to be in our new location.) Due to this, we only did the blood splatters on the close-up shots so that Alex could get as close to Aidan with the water gun as possible. This meant less room for error with my camera work – and as it turned out I could have done with more room for error.
- Again, due to lack of time, we didn’t have the opportunity to dress the set for the post-surgery interview with the vet, meaning that we used the same corner of the room that we used for the surgery. Although this still worked, it didn’t give the look we were initially intending to go for. We must manage our time better in future shoots.
Friday, 4 May 2018
TRANSITION UNIT: Shot List
To ensure the shoot day goes as smoothly as possible and that we get all necessary shots for the narrative, I made a shot list to follow. This shot list details the type of shot, content of the shot and any extra notes for the scene.
I will work with the director to work out in which order we will film the piece to ensure we use the time in our location as efficiently as possible.
As well as working out a shot list, I have decided on the camera settings I will use (with help from the test shoot we performed).
Camera Settings:
ISO – 200
Shutter Speed – 1/30
Aperture – f/5.0
TRANSTION UNIT: The Script
As the writer for our project, Alex wrote the script.
Final draft:
I used the script to inform my shot list. The script helped to map out the action in each scene, enabling me to pin point which shots need to be filmed in order to capture this.
First draft:
Final draft:
I used the script to inform my shot list. The script helped to map out the action in each scene, enabling me to pin point which shots need to be filmed in order to capture this.
Thursday, 3 May 2018
TRANSITION UNIT: Risk Assessments
As we are sharing the producer role, after I performed the location recces, I sent the images and information to Melissa to fill out the risk assessments. This will ensure that any risk of damaging equipment or injuring talent is minimised.
TRANSITION UNIT: Updated Location Recce (Vet's practice, Sheila's home & fields)
Unfortunately, the events venue I previously found for the location would not allow us to film with animals inside their premises. This meant I needed to find a new location for the vet's practice scenes quickly.
I thought about a local village association meeting room, it is a large space which (like the events venue) can be manipulated to look like a vet's practice.
Like the other venue, this room would cover the location for the waiting room, the consultation room and the operating theatre. Unlike the other venue, this location also works for the exterior of the vet's practice and we will actually have access to two different rooms - this will work even better for manipulating the venue into the different locations we require.
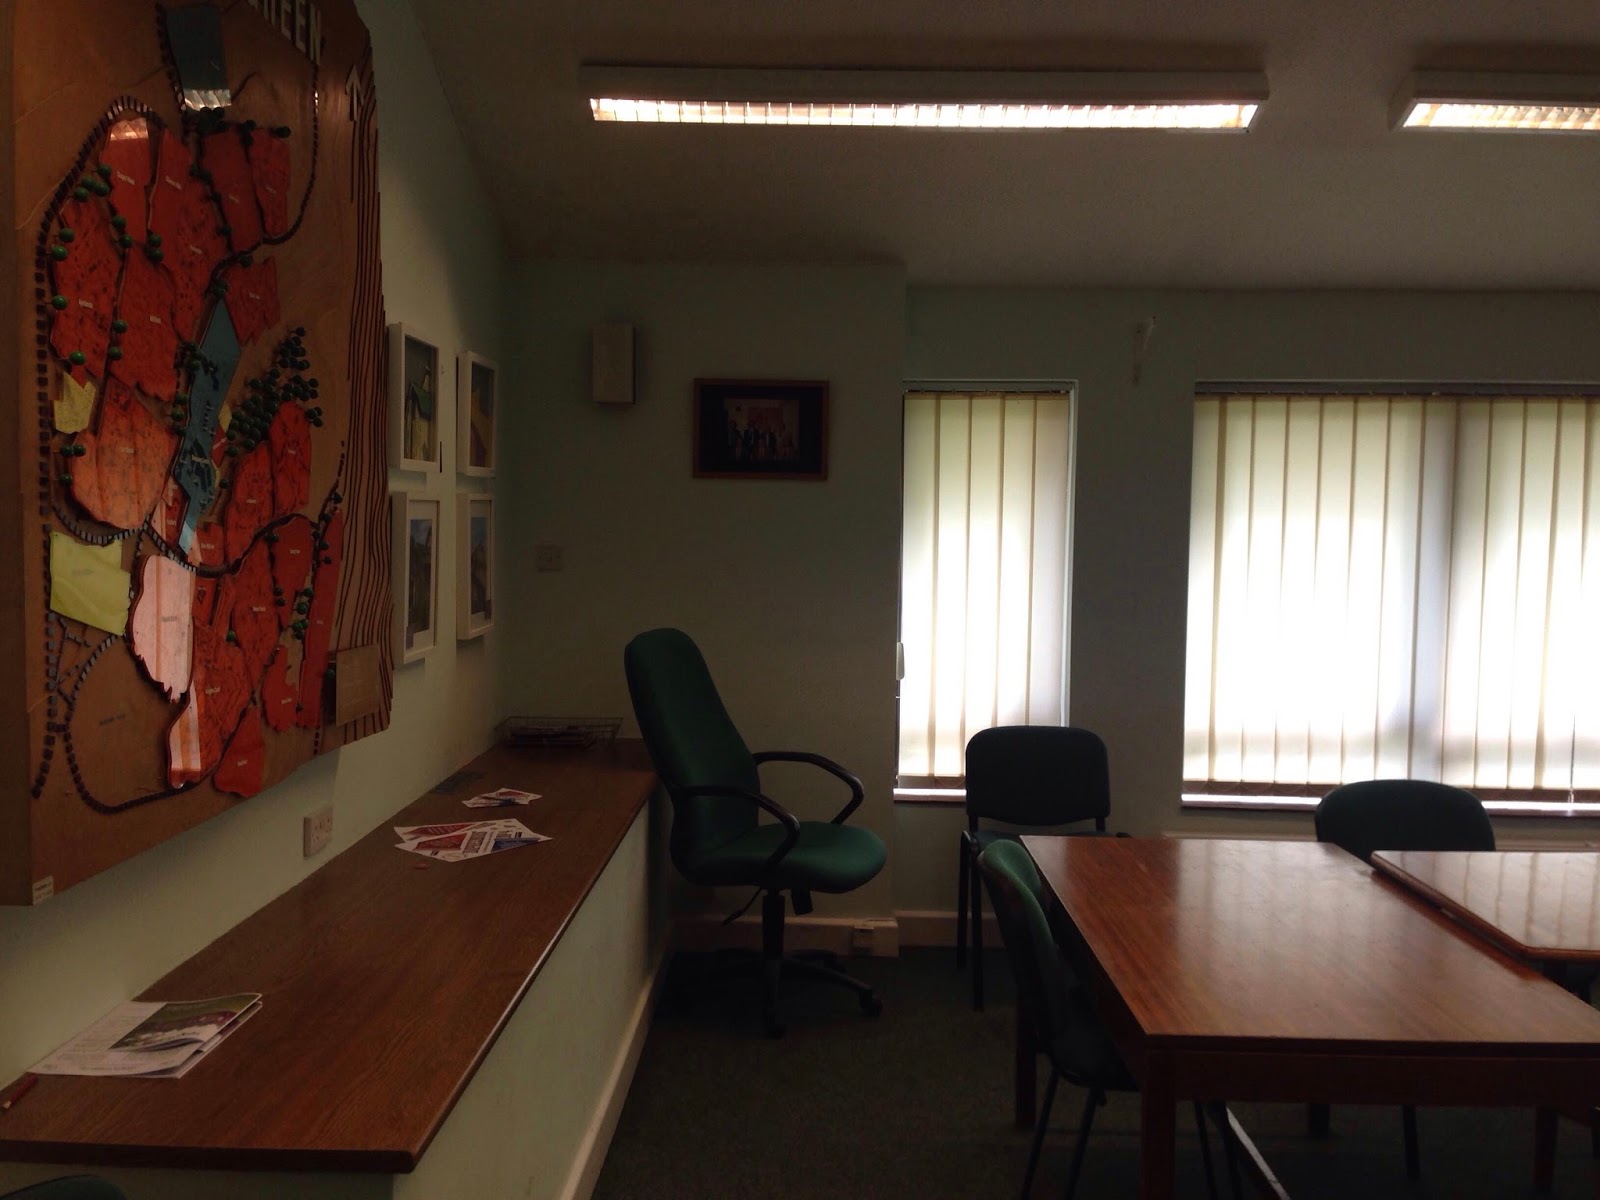
The foyer will work well as the waiting room - this gives a completely different atmosphere to the large plain room which will act as both the consultation room and operating theatre. The foyer has large windows down one side of the room, this allows for a lot of natural light to enter the room if we film in the afternoon / evening as the windows face west which corresponds with the sun set. This will give the waiting room the warm, welcoming, softly lit atmosphere that we are aiming for. It is unlikely that we will need to artificially light this room as long as it is not a dull day. If we do need to light the room, it will be done in a way to emulate natural light coming through the windows. This will be done through using both soft box lights and reflectors to diffuse the light. We are able to pin our own posters on the notice board and on the walls which will help to transform the space into a waiting room. As the foyer is used as a reception area, it already has a reception desk, making it believable as a waiting room area.

The meeting room is a large space with tables and chairs for us to use. The walls are not as plain as the events venue walls but I have checked with the staff that it will be okay to remove existing things from the walls and add our own decorations - they agreed that this would be okay as long as the rooms are returned to their original state. We will move the chairs out of the meeting room into the foyer to create the waiting room atmosphere, leaving the meeting room with just the tables and an office chair. The big table will be moved to the side of the room out of shot and the smaller table will be pushed up against the wall for the consultation room scene. The walls around the table will be dressed to resemble that of a vet's consultation room. The blinds will be open to allow the natural light into the room, this will be aided by two artificial soft box lights to give the room a natural, bright yet clinical feel. The operating theatre will be the plain white corner of the room - this will be mainly dimly lit (with the blinds drawn) with two smaller LED lights to harshly light the operating table and the vet. This is to simulate the lights in an operating theatre.


The outside of the village association is quite plain meaning that along with the voice over from the narrator, the location is believable as a vet's practice - this is something that the other events venue did not have (we would have still had to find another location to act as the exterior of the vet's practice).
I discussed the details of the location with the staff. Booking the location would cost £16 for the entire afternoon - making it more cost effective than the other venue (and the features that this location possesses are more ideal for our requirements). I also ensured to check that filming with animals was okay in this location and that there were appropriate facilities in the location and the surrounding area. There is a kitchen for food and water for the dog as well as a field out the back of the hall so that the dog can be taken out at regular intervals.


For Sheila's home, I will be using my house as we need a homely location that can be dressed with photos of Coco. My dining room has a large side board which allows a lot of space for photo frames. Opposite this, there are large patio doors which allow for a lot of natural light. This will again add to the natural homely feel that we require for this location. This will contrast to the cold, harsh, clinical look of the vet's practice.

The location is also spacious meaning that there is enough space to get the footage of Sheila and Coco with two cameras set up on a wide and a close up shot.

As we will be using natural lighting (dependent on the weather), there should be no lighting equipment required. If it does end up being a dull day and lighting equipment needs to be used, we will need to ensure the wires are out of the way to prevent these being a trip hazard. The windows are on the east wall - meaning the best natural light will be in the morning so the order of the shoot day should allow for this. I will liaise with the director to organise this.
I will pass on the location recce details to Melissa so that she can perform the risk assessments on these locations.
Rough risk assessments:
- There are the usual trip hazards in these locations. The tripods and lighting equipment could be a trip hazard - these need to be pointed out to the cast and crew to avoid the equipment getting damaged and the talent getting injured. Furniture is also a trip hazards so these will need to be highlighted to crew and cast.
- The outside locations also have the hazard of weather - we will need to keep an eye on the weather an film when it is not raining to avoid equipment getting damaged.
- We will need to ensure not to block any fire exits in both the village association location and 'Sheila's home' (although there is extremely little risk of fire).
- We will be working with fake blood in the meeting room location (for the operation scene) so we will need to ensure care is taken to prevent getting this on the walls and the equipment. The floor will be covered with newspaper and I will ensure the equipment is far enough from the fake blood to avoid this getting damaged.
I thought about a local village association meeting room, it is a large space which (like the events venue) can be manipulated to look like a vet's practice.
Like the other venue, this room would cover the location for the waiting room, the consultation room and the operating theatre. Unlike the other venue, this location also works for the exterior of the vet's practice and we will actually have access to two different rooms - this will work even better for manipulating the venue into the different locations we require.
The foyer will work well as the waiting room - this gives a completely different atmosphere to the large plain room which will act as both the consultation room and operating theatre. The foyer has large windows down one side of the room, this allows for a lot of natural light to enter the room if we film in the afternoon / evening as the windows face west which corresponds with the sun set. This will give the waiting room the warm, welcoming, softly lit atmosphere that we are aiming for. It is unlikely that we will need to artificially light this room as long as it is not a dull day. If we do need to light the room, it will be done in a way to emulate natural light coming through the windows. This will be done through using both soft box lights and reflectors to diffuse the light. We are able to pin our own posters on the notice board and on the walls which will help to transform the space into a waiting room. As the foyer is used as a reception area, it already has a reception desk, making it believable as a waiting room area.

The meeting room is a large space with tables and chairs for us to use. The walls are not as plain as the events venue walls but I have checked with the staff that it will be okay to remove existing things from the walls and add our own decorations - they agreed that this would be okay as long as the rooms are returned to their original state. We will move the chairs out of the meeting room into the foyer to create the waiting room atmosphere, leaving the meeting room with just the tables and an office chair. The big table will be moved to the side of the room out of shot and the smaller table will be pushed up against the wall for the consultation room scene. The walls around the table will be dressed to resemble that of a vet's consultation room. The blinds will be open to allow the natural light into the room, this will be aided by two artificial soft box lights to give the room a natural, bright yet clinical feel. The operating theatre will be the plain white corner of the room - this will be mainly dimly lit (with the blinds drawn) with two smaller LED lights to harshly light the operating table and the vet. This is to simulate the lights in an operating theatre.

The outside of the village association is quite plain meaning that along with the voice over from the narrator, the location is believable as a vet's practice - this is something that the other events venue did not have (we would have still had to find another location to act as the exterior of the vet's practice).
I discussed the details of the location with the staff. Booking the location would cost £16 for the entire afternoon - making it more cost effective than the other venue (and the features that this location possesses are more ideal for our requirements). I also ensured to check that filming with animals was okay in this location and that there were appropriate facilities in the location and the surrounding area. There is a kitchen for food and water for the dog as well as a field out the back of the hall so that the dog can be taken out at regular intervals.

Outside the village association, there is a field surrounded by trees and orchards - creating the idyllic scenery for the scenes of Sheila and Coco walking and playing fetch. This is a public area so we will have to ensure we shoot away from the public / get their signed consent to be in shot / blur their faces to avoid infringing their privacy. With this location, the weather also poses a risk. The forecast is looking positive, however, if this changes to rain we will need to work around this to avoid damaging the equipment. As tested in the test shoot, I will be using a DSLR on a shoulder mount to ensure stable handheld footage. I will need to make sure to map out the location before the shoot to identify any uneven ground to prevent trip hazards.

For Sheila's home, I will be using my house as we need a homely location that can be dressed with photos of Coco. My dining room has a large side board which allows a lot of space for photo frames. Opposite this, there are large patio doors which allow for a lot of natural light. This will again add to the natural homely feel that we require for this location. This will contrast to the cold, harsh, clinical look of the vet's practice.

The location is also spacious meaning that there is enough space to get the footage of Sheila and Coco with two cameras set up on a wide and a close up shot.

As we will be using natural lighting (dependent on the weather), there should be no lighting equipment required. If it does end up being a dull day and lighting equipment needs to be used, we will need to ensure the wires are out of the way to prevent these being a trip hazard. The windows are on the east wall - meaning the best natural light will be in the morning so the order of the shoot day should allow for this. I will liaise with the director to organise this.
I will pass on the location recce details to Melissa so that she can perform the risk assessments on these locations.
Rough risk assessments:
- There are the usual trip hazards in these locations. The tripods and lighting equipment could be a trip hazard - these need to be pointed out to the cast and crew to avoid the equipment getting damaged and the talent getting injured. Furniture is also a trip hazards so these will need to be highlighted to crew and cast.
- The outside locations also have the hazard of weather - we will need to keep an eye on the weather an film when it is not raining to avoid equipment getting damaged.
- We will need to ensure not to block any fire exits in both the village association location and 'Sheila's home' (although there is extremely little risk of fire).
- We will be working with fake blood in the meeting room location (for the operation scene) so we will need to ensure care is taken to prevent getting this on the walls and the equipment. The floor will be covered with newspaper and I will ensure the equipment is far enough from the fake blood to avoid this getting damaged.
Wednesday, 2 May 2018
TRANSITION UNIT: Location Recce (Vet's practice)
As we all shared the role of producer, I did the location recces for our shoot.
For the shoot we needed:
- a vet's surgery (exterior)
- a waiting room
- a consultation room
- an operating theatre
- Sheila's home
Initially I thought of the events venue we used for our Documentary Unit shoot. This venue has a lot of plain rooms which can be manipulated to look like a waiting room and a consultation room.
I went to the location to check out the space and find out the details of the room and which props / equipment we would have access to in the location.
Room 3 of the venue is a large white room with a TV on the wall, and chairs and tables to use.
This could be used for the waiting room scene, the consultation room scene and the operation theatre scene as the room can be manipulated to look different ways. I checked that we could change the room around and stick up posters with white tack - this was all okay. The venue also had a flip chart to use which the vet could use to draw the outline of the cow, a metal trolley which could be used as a medical trolley for the vet's surgery equipment and a TV screen which could be used for vet's information screen / name announcements.

For our shoot we will move the table out of the centre of the room. We would transform the space underneath the TV monitor to look like a waiting room - this would involve putting a line of chairs along the wall underneath. The corner of the room near the door could be transformed into the consultation room - this would involve sticking up vet's posters, dressing the set with appropriate equipment and having the vet dressed in appropriate uniform.

The surgery room will be the plain white corner of the room - we aim to have quite dim overall lighting but with harsh light on the vet and surgery table to emulate the lighting in an operating theatre (as tested in the test shoot).

Outside the room there is a space for a sign to be put up, this can be used to put up a 'consultation room' sign. This will be for when Sheila and Coco walk into the consultation room to establish the location.

Outside the building there are bins to use for the final scene - one recycling bin and normal bin which works perfectly with the script.
I discussed the details with the venue's staff to ensure the location had all facilities we needed and to get the details of our booking sorted.
The room booking would be £12 an hour - we would probably need the room for 5 / 6 hours so this would end up being quite expensive - however, we would be using the location for multiple scenes which means we would not need to book any other locations so there will not be any additional costs.
I was shown how to adjust the artificial lighting in the room - they can be turned on or off or adjusted using a dimmer switch - the lighting will be best left off so that we can light the location with our own soft box lighting. There is a large window to let in a lot of natural light which will be ideal for the waiting room scene and consultation room scene (these real life locations usually have very soft, natural lighting so we wish to emulate this) - but we will close the blinds for the surgery scene and rely solely on the artificial soft box lighting (as tested on the test shoot) to give a harsh clinical look.
The room is partitioned with a folding wall - this means that if there is another booking in the conjoining room, there could be issues with sound. I checked with the staff as to whether there will be a booking in the room - there is but only a food and drinks area for the booking in the upstairs auditorium which should mean there will be little noise. There is also a cafe outside the room which could also contribute to noise, however, there should be large periods of quiet times which will give us the time we need to shoot the footage.
As Melissa is doing the risk assessments, I shared the photos with her and my rough notes of the risks I noticed in the location. We will discuss the location as a group and if we all agree that it is suitable for our requirements, we will book it.
Rough risk assessment:
- Trip hazards (chairs, tables, cables in the room as well as cables for the camera and lighting equipment). These hazards can be reduced by taping down electrical cables and mapping out camera movements and actors' movements before shooting. There were a couple of slightly raised paving slabs outside which could also be a trip hazard, therefore, before shooting the handheld footage by the bins, I will map out the movements to prevent injuring myself and damaging the equipment.
- There is very little risk of fire, however, the room we will be working in has a fire exit which will need to remain clear from all equipment and furniture.
- When rearranging the furniture in the room, camera and lighting equipment should be moved aside to prevent getting accidentally knocked over and damaged.
Tuesday, 1 May 2018
TRANSITION UNIT: Test Shoot
Today we did a test shoot for our project. The aim of the day was to try out the script in practice to work out what shots will be required for the narrative of the piece.
As writer / director of our group, Alex wrote the script.
As Director of Photography, I then took this script to begin thinking about how to block out shots. I didn't make a shot list or storyboard for the test shoot as the purpose of this test shoot was to try out which shots would be needed, however, I did use my research into documentaries and mockumentaries to inform my decisions about which shots to try out.
The first thing we wanted to try out on the shoot was the camera angles and lighting for the interview segments. This was mainly for my benefit as director of photography as I had the opportunity to play around with the camera and lighting settings to work out which gave the best look. It was also a good opportunity to re-familiarise myself with camera equipment after being producer on the last project.
For the interview segments I used a two camera set up with a Canon 60D and a Canon 700D and two Rode directional microphones - one positioned near the subject and the other attached to the camera. I matched the settings on the cameras; I used f/6.3, ISO1600 and a shutter speed of 1/100 and then white balanced both cameras. I also used two Interfit Softbox lights to light the subject.

One camera was used for a wide shot of the subject whilst the other was used for a close up - using this two camera set up will allow the editor to edit more seamlessly between these clips (rather than having to use the same camera to film the two different angles).

Aidan ran through his lines as Dr. Stewart (however, as we didn't have access to our location for his scenes, we used the location for Sheila's home). Melissa will then piece these together to test how the two cameras can be switched between. Alex then ran through Sheila's lines - footage of Sheila and Coco will then be layered over the top in the edit - testing this part will allow Melissa to test piecing together the interview with the sequences of Shelia and Coco.
Having reviewed these clips, I think I should have used a lower ISO as the quality of the image isn't as sharp as it could be and there is evident noise in the footage. To then compensate for the darkness of the footage I could have used a slower shutter speed and a wider aperture as well as increasing the light coming from the soft box lighting. This is something I have learnt from the test shoot and will carry through to the actual shoot.
The second thing we tested was the sequences of 'Sheila' and Coco playing fetch. This was useful for me to again test the camera settings but this time in an outdoor environment with bright natural light. I kept varying the camera settings used to try and get the optimum image - I have decided that the best route to go is using a medium ISO of 400, an aperture of f/8 then using a slower shutter speed like 1/60 - this will give a bright yet good quality image which can then be manipulated in post production to give the idyllic look required for these shots. The trickiest thing about these shots was keeping the footage in focus whilst a lot of movement was occurring. Following the dog and 'Sheila' playing fetch meant the focus needed to be constantly adjusted to keep a clear and sharp image - the best way to ensure the footage is in focus is to block out the rough movement of the shots beforehand (however, this can be difficult when working with animals). I was also getting used to using a new piece of equipment - a shoulder mount. At first I found this difficult to use as instead of adjusting the focus on the camera, I was using a focus puller as well as trying to keep the camera steady. I did get used to this equipment and feel it will work well for these shots as I was able to achieve some good quality, steady footage which would otherwise have been rough handheld footage. The steadiness of this footage will be effective in portraying the idyllic look required for these shots.

The next thing to test shoot was the blood splatter. In the script, it is described the blood splatters on Dr. Stewart's face - we wanted to test this to see how easy this would be to create. At first, we used a Lucozade bottle to spray fake blood onto Aidan's face. However, this didn't provide an intense enough blood splatter - it was very weak and not very effective on camera. We revised this method and next tested a water gun to squirt the fake blood onto Aidan's face. This was far more effective - we were able to control the aim and amount of blood splattered better and provide a more intense squirt. This will be more effective in representing the blood splatter for the surgery as it more closely resembles blood squirting from an artery. The camera settings I used for this were f/11, ISO400 and a shutter speed of 1/60 - this created a good quality image that I was very happy with. However, this scene will actually be shot inside with more dramatic lighting so the camera settings are likely to change. Although, using these camera settings did help to inform my decision to use similar settings for the shots of 'Sheila' and coco playing fetch outside so testing these settings was still of use to me (but the main purpose of testing this scene was to test the blood splatter).


As we know we want to use dramatic, clinical lighting for the surgery scene, we thought we would test this. To emulate the overhead light on the surgery table, we used a small LED light and turned this up to its highest setting. We then used another small LED light on a lower setting from below to fill in some of the shadows. The camera settings I used for this were ISO800, aperture f/4.0 and a shutter speed of 1/60. This created a very dramatic look which I was extremely happy with - once the set is dressed and Aidan is in costume, this will look very realistic as a vet's operating theatre. Ideally, the look of this footage would have a more clinical feel which would mean a cooler lighting tone - however, we decided this would be done better in post production to prevent lowering the image quality.

Now that we have performed our test shoot, I will make a storyboard and shot list for our shoot - this will help to ensure that we capture all necessary shots for the narrative of our project. Once I have made my storyboard and shot list, I will send this to the director for any additions / amendments to ensure his vision as director is fulfilled. The shot list and storyboard will also be helpful for the editor as they will understand how the footage is intended to look and will inform their decision of how to piece it together.
What I have learnt from the test shoot
- Having not been behind the camera at all for the last project I was a little rusty with the camera settings which meant I made a few avoidable mistakes. I used a too high ISO for the interview footage meaning there was noise in the footage - this will be fixed for the shoot by using a lower ISO and more lighting from the light sources as well as a slower shutter speed and a wider aperture.
- Retaining focus on a moving subject (especially an animal) is difficult but can be worked around by blocking out movement before shooting the footage - this highlights the importance of a shot list.
- I have learnt how to use a new piece of equipment - the shoulder mount. This allowed me to get some steady footage whilst following moving subjects. Without a shoulder mount, this footage would have been very rough as I would have had to shoot this handheld. The smooth, steady shots will add to the idyllic nature of this sequence which highlights how useful this piece of equipment is.
- Communication with other members of the team is important in order to get the best outcome. I communicated with the director to ensure the shots that I was envisioning were in line with what he wanted as director. I also communicated with the editor about the best way to handle the look of some of the footage e.g. with the dramatically lit surgery scene we agreed I would focus on the dramatic lighting and framing of the scene and allow the editor to adjust the colouring in post production to make the image look more clinical.
Subscribe to:
Posts (Atom)