Tuesday 31 January 2017

DIRECTIONS UNIT: (Project Prep) Storyboarding and Shot Listing

In oder to gain a better visual idea of how I wanted my final product to turn out, I storyboarded my ideas over 5 sides of A4 paper. 


Although my storyboard was only rough, it helped me to figure out where to position my actors, where to position the camera and ultimately where I wanted the audience to be positioned within the scene in order for them to feel the mood set in the scene.

I decided to start in a bit of an unconventional manner - I didn’t start with the typical establishing shot, instead I decided to start with a close up of Juliet knocking on the glass. I wanted this to spark the question of where she is - who’s house is she knocking at?

After this I then opted for the wide shot in order to establish the location and the characters’ relationship to each other. After this I then chose to go in with shot reverse shots in order to show their conversation. I wanted this to contrast to the end of the scene where I use mainly wide shots in order to convey the awkwardness of the atmosphere and situation.

For the scene at Juliet’s doorway I decided to go for mainly medium shots. I added in a few close up shots as well in order to emphasise these parts of the scene e.g. ‘To me, you are perfect’. This emphasises the effect of this line and shows Mark’s strong feelings towards Juliet.


Storyboarding my script really enabled me to visualise how I wanted to film my production. It also made me realise what shots I would need to capture on shoot day. Knowing these shots in advance helps with the scheduling of the shoot day as I know what shots need to be captured in which locations - the shoot day can be structured around which coverage is needed.


Monday 30 January 2017

DIRECTIONS UNIT: (Project Prep) Breaking Down My Script

Once I'd transcribed my script from the two scenes of Love Actually I had chosen, I decided to break down the elements of my script and block out the actions of my characters. 


Since I wanted to shoot the scenes in a different way to the original screenplay, I decided to highlight and annotate the aspects that I planned to change.

e.g. where Juliet asks if she can come in, I have changed this to "Can I sit down?" as she has already entered Mark's apartment.

I have then annotated what I would change about the stage directions and which movements of the characters I wanted to change.

Once I broke down the script, I created a table of new stage directions (with the dialogue included in the tables as well). This just helped to block out where I wanted the new stage directions and which pieces of dialogue accompanied them.


Once I had planned out the new screenplay I decided to re write the proper screenplay so that the actors would have the correct dialogue and stage directions.


Now that I have my screenplay, I will send these on to the actors. I will then storyboard the shots so that I know exactly which footage I want to capture on the day. Once my storyboard is complete I will test my ideas to make sure they work.

DIRECTIONS UNIT: Editing and Sound Design

Editing

- The art of joining separate shots together
- Unique to film making - often referred to as 'invisible art' - when done well, it is so immersive the viewer doesn't notice the edits
- Creates emotion, drama, rhythm and action
- Language of film editing has developed over the years, the technology has developed as well
- Films used to be spliced together using a machine called a Steenbeck

- Avid is the editing system most commonly used in professional editing studios


- Continuity editing is the predominate form of editing in narrative film
- Taking discontinuous shots and creating a continuous whole
- Continuity editing is crucial for good story telling - only leave bits in that help your narrative
- The pacing of the editing can help to create drama. The editing creates pace, rhythm and emotion.
- An emotional scene should hold shots for longer
- Ana action scene will be cut quicker

There are many different types of editing techniques:
- match on action
- cross cutting
- montage
- fade / dissolve

There are different stages in the editing process:
- log
- assembly cut
- rough cut
- fine cut
- final cut

Sound Design 

- capturing, layering and mixing individual sound elements to create one single soundtrack for the project
- shoot and edit sound

Sound Layers:
(7 different types of tracks)
- Dialogue - recorded dialogue from shoot
- Sync - recorded sound from shoot (not dialogue)
- ADR - automatic dialogue replacements - dubbed dialogue
- FX - certain sound effects
- Foley - sound effects created by foley artists
- Atmos - sound elements that make up the atmosphere
- Music - all music (non diegetic and diegetic)

The art of sound design is to add depth, feeling and emotion.

Friday 27 January 2017

DIRECTIONS UNIT: Lighting Workshop 2

Following on from the lighting workshop the week before, we had another one but this time we were given a lot more freedom in terms of the effect we wanted to create. We were provided with more equipment to experiment with, such as reflectors and different coloured gels. 


The aim of this workshop was to experiment with the lights and see if we could replicate specific lighting techniques, either from an image we had found or from an idea we had for our own production. 

The first thing we decided to do was to see if we could still master the three point lighting technique. We set up the tungsten lights with a key light, a fill light and a back light. This was the look we achieved:


The light is a little too intense which creates a harsh shadow on Jason's face. We recognised this could be resolved by changing the distance of the lights from the subject and using scrim to dim the light,  however, we didn't want to spend too long replicating the three point lighting as we had many more exciting and different ideas we wanted to try with the lights. 

The next task we set ourselves was trying to create a silhouetted image. This was a lot harder than we anticipated. We could not control the lighting in the studio itself meaning that setting was quite bright itself. This therefore made it hard to control the lighting for the silhouette as the studio lighting interfered with our tungsten lighting. The studio is also a vast space meaning we had a large amount of space behind us, this again made it challenging to achieve the perfect silhouette. We still gave it a good go and managed to achieve some very stylised looks (which although weren't what we were aiming for, still looked pretty good.)


Monday 23 January 2017

DIRECTIONS UNIT: Directing Workshop with Steve Finn 2

Steve provided us with a variety of different scripts. The script I was given was called 'Two Women Scene'. I got to work immediately with blocking the scene in order to work out where I would want to position the camera in order to get the most effective master shot.

I also highlighted all the movement within the scene to block where the characters would be moving in order to find the perfect master shot and work out what additional coverage was needed.


I decided the best position to place the camera in would be next to the fridge. This way we can see Elizabeth's approach and her interaction with Kristin. This then gives Kristin the opportunity to walk over to the fridge whilst still being in shot. This shot also allows the full table to be seen so Kristin can be seen laying the table for dinner and Elizabeth can be seen looking for the salt. I also got coverage of over the shoulder shots of each character which could be combined with the master shot in order to create an interesting and exciting scene.


This photo shows me standing in the position I wanted the camera. The table in the middle is acting as the dinner table and the table next to me is acting as the fridge. As important as it is to block the scene in terms of camera angles, it is equally (if not more) important to block the actors and rehearse with them so they know what they're doing.

Friday 20 January 2017

DIRECTIONS UNIT: Lighting Workshop 1

Lighting is a key point to any production. It can be used to convey mood, emotion and atmosphere. It can also be used purely for a cinematic, visual effect.

The main focus of this lighting workshop was to learn about three point lighting. Three point lighting is exactly what it says on the tin, this method of lighting involves using three lights in different positions in order to illuminate the subject. 

The lights all have their own name and their own specific purpose:

- The Key Light: this is the brightest light and typically the light you set up first. The light is placed on the floor  at a 45º angle from the subject and is angled towards them at a 45º angle from slightly above head height.

- The Fill Light: this light is used to fill the shadows created by the key light so that the light is even across the subject's face.

- The Back Light: this light is used to help define the subject from the background. It helps to illuminate the subject so that they stand out from the surroundings.


We were then given the opportunity to have a go with the lighting ourselves. We set up three tungsten lights and positioned them in the appropriate positions. We used scrims to change the intensity of the lighting, but this could also be done by positioning the lights further away from the subject. 


We decided to open up the barn doors in order to flood the light onto the subject. However, this lead to us creating a rather over exposed image (as shown below).
  

We then realised the intensity of the light was too strong as it completely washed out Alex's face. In order to resolve this issue, we moved the lights further away from him and used some scrim to dim the light.


We finally managed to achieve a good image with the three point lighting technique. The key light and fill light work perfectly together to give an even lighting effect across Alex's face (with a natural looking shadow falling across the left half of his face). The back light works to separate Alex from the background which we found particularly hard due to Alex's clothing being dark against the dark background.

Thursday 19 January 2017

CONTEXTUAL STUDIES: Metaphor and Meaning

Screening: Jessica Jones (NETFLIX)

What is a metaphor?
- an implicit, implied or hidden comparison between two things.
- Shakespeare's "all the world's a stage"
- a creative means to stimulate audience by getting them to think in new ways

Allegory - an extended or complex metaphor, or connected series of metaphors.
An allegory usually has two meanings: literal and symbolic (or metaphorical)
Alien is regarded as a feminist / Freudian allegory, using visual sexual metaphors.

Allusion - an indirect or passing reference, usually with no metaphorical intent
Often used as a homage or nod to a related show or film or writer/directors' inspirations

Analogy - a literal comparison without further meaning (a metaphor uses analogy with greater meaning)
- Forrest Gump's "Life is like a box of chocolate's"

Metaphor in TV and Film
- while writers may use verbal or literary metaphors, most metaphors in film and TV will be visual
- metaphors generally need to be constructed of familiar visual symbols and references and cannot be overly complex
- like a verbal metaphor, they will break down if there are too many analogies to process at once. But there needs to be enough detail that the metaphor is recognisable and easily understood.

Jessica Jones
- dominant narrative theme is power and control

Wednesday 18 January 2017

DIRECTIONS UNIT: Directing Workshop with Steve Finn

Today we had a directing workshop with Steve Finn. Steve's main learning objective was for us to learn how to block a scene and how to get a good master shot for the scene.

Getting a master shot is important as it gives you something to keep coming back to throughout the scene. It is important to get coverage but it is absolutely vital to get a good master shot.

We were each given a script of the same scene and as a class we broke down the script in order to understand the feelings and emotions the characters would be feeling. We could then use these feelings and emotion to figure out the best way to capture the scene and therefore find our master shot.

We were then individually given time to block the scene and figure out how we would shoot the master shot. I thought the camera would best be placed behind Robert's desk so that we could see Helen's approach to the desk and then follow their interaction through to the end without having to cut (although additional shots would make it more interesting).


Monday 9 January 2017

DIRECTIONS UNIT: Screen Language

Screen language is a complex integration of visuals and sounds. It allows you to add layers to the story beyond the script.

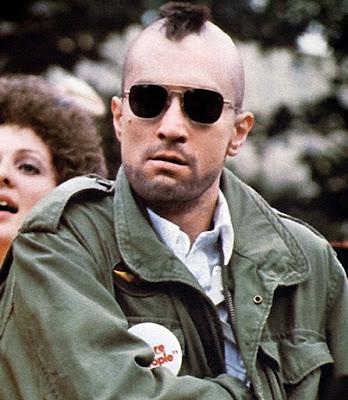
Taxi Driver (dir. Martin Scorsese)
- made on location with no special effects
- used camera, lighting, sound and performance to create a complex story from the script

Characters

Travis is arguably the good guy in the movie - he can be considered the anti hero. However, he is unstable, mentally ill, racist, killer etc.


Betsy is a picture of innocence. She is first introduced in a white dress (a colour which carries connotations of purity).


Iris is childish which can be seen through her choice of outfit in the breakfast scene with Travis. She can be considered the blind hero.


Each character in the film is unique, distinct and invested in. No matter how small the role, each character feels like they have their own individual story which is expressed through their outfits, mannerisms, dialogue and performance.

Travis is shown in his 'suit of armour' near the end of the film. This is a specific costume that represents the character when they're going to get down to business. 


The setting of the piece helps to contribute to the time, setting, tone, character, mood, authenticity and story.


The locations have been cleverly chosen in order to frame, trap or corner Travis.

A physical divide can be seen between him and Betsy when they're in the cafe. This emphasises his isolation as a character.


Camera

When Travis is having his job interview, he is stood higher than the boss who is sitting down. This alludes to the idea that Travis has the power in this situation.


When Travis is walking through the taxi rank, the camera follows tracks him, then pans in the opposite direction as he walks behind the camera and then tracks him again. The shot goes from showing Travis, to being in his point of view, before going back to showing Travis.

Lighting and colour

Red features a lot throughout this film. The colour carries connotations of blood, death, anger, fear and danger. 

Editing and rhythm

There isn't always continuity in the editing and rhythm but it works to give the scenes a greater effect.

Sound, music and detail

The rhythm can be compared to that of a heartbeat / pulse. 

Perception and perspective

The way you choose to frame the scene as the director impacts the perspective you provide. Key factor in how an audience perceives the story.